This guide walks you through the process of uploading a Change Order Request (COR) created outside of Clearstory. By following these steps, you can share the request with your customer and ensure it is logged in Clearstory’s digital COR system.
Uploading Your COR
-
Navigate to the Upload Page
- In your Clearstory account, go to Add New > Upload a Change Order Request.
- Once there, you should see the upload interface.

-
Select the Project
- Choose the project to which you are uploading the COR.
- Your customer’s email will automatically populate in the "Email To" field, while you and your team members will be listed in "Email CC." This is the distribution list for the COR email notification.

-
Enter COR Details
- Change Order Request Number: Clearstory assigns the next available number based on previous CORs for the project. You can override this if you use a custom numbering system, but we recommend sequential numbering.
- Title: Provide a brief description of the COR. This will appear in the email notification and the COR log summary.
- Total Cost: Enter the total lump sum amount for the COR.
- T&M Tag Numbers: If your COR is based on Time and Material (T&M) work (e.g., Work Orders, Extra Work Authorizations, Tickets), list the associated tag numbers. If using Clearstory’s mobile app, you can select tags from the dropdown.
- Customer Reference Number: If your General Contractor assigns a PCO, PCI, CE, or other tracking number, enter it here.
- Include COR Log Link: Check this box to provide a link to your digital COR log.

-
Attach and Send
- Message: Add a custom message for the email sent to your customer.
- Upload COR File:Upload your PDF file by either dragging and dropping it into the designated area, clicking the Upload button, or selecting from the available upload options. (Only a single PDF can be uploaded to maintain organization on your customer's end.)
- Click Send to email the COR to your customer and add it to the digital COR log.

Additional Options for Approved CORs
If your COR is already approved, click More Options to update:
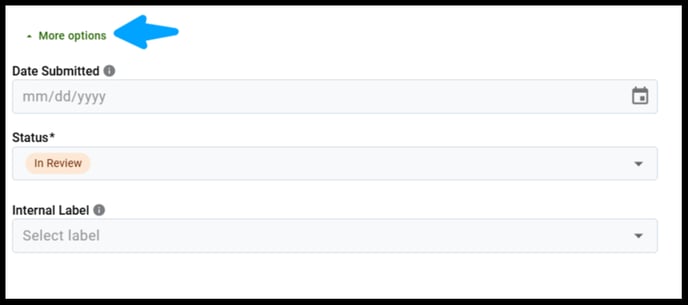
- Date Submitted
- Status: Mark as "Approved"
- Label: Add a relevant label if needed

COR Submission Confirmation
Your uploaded COR will be stored in the COR log and emailed to the recipient with a link to view the attached PDF.
Here is a sample of the email that is sent:
