
Manage Project Level Rates
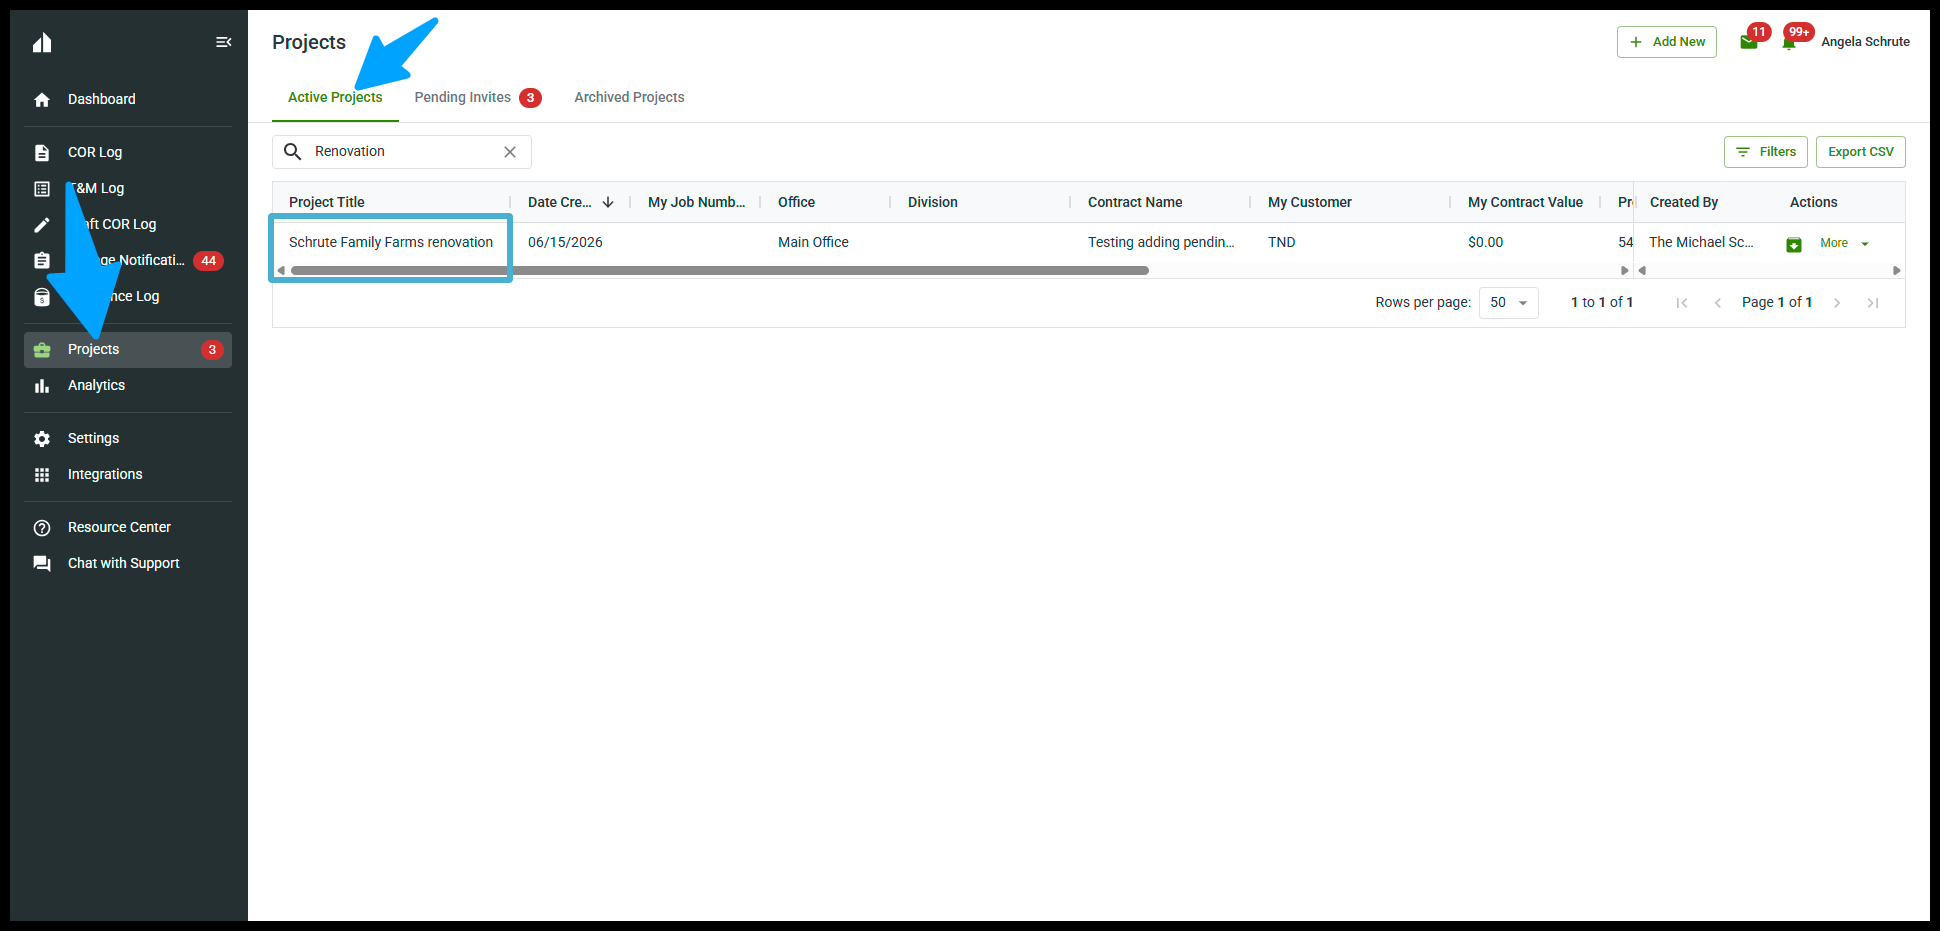
- To get to this section, navigate to Projects in the left navigation bar, then select your project from the Active Projects tab.

- If you have been invited to a project but haven't joined yet, check the Pending Invites tab — click Accept to join the project before proceeding.
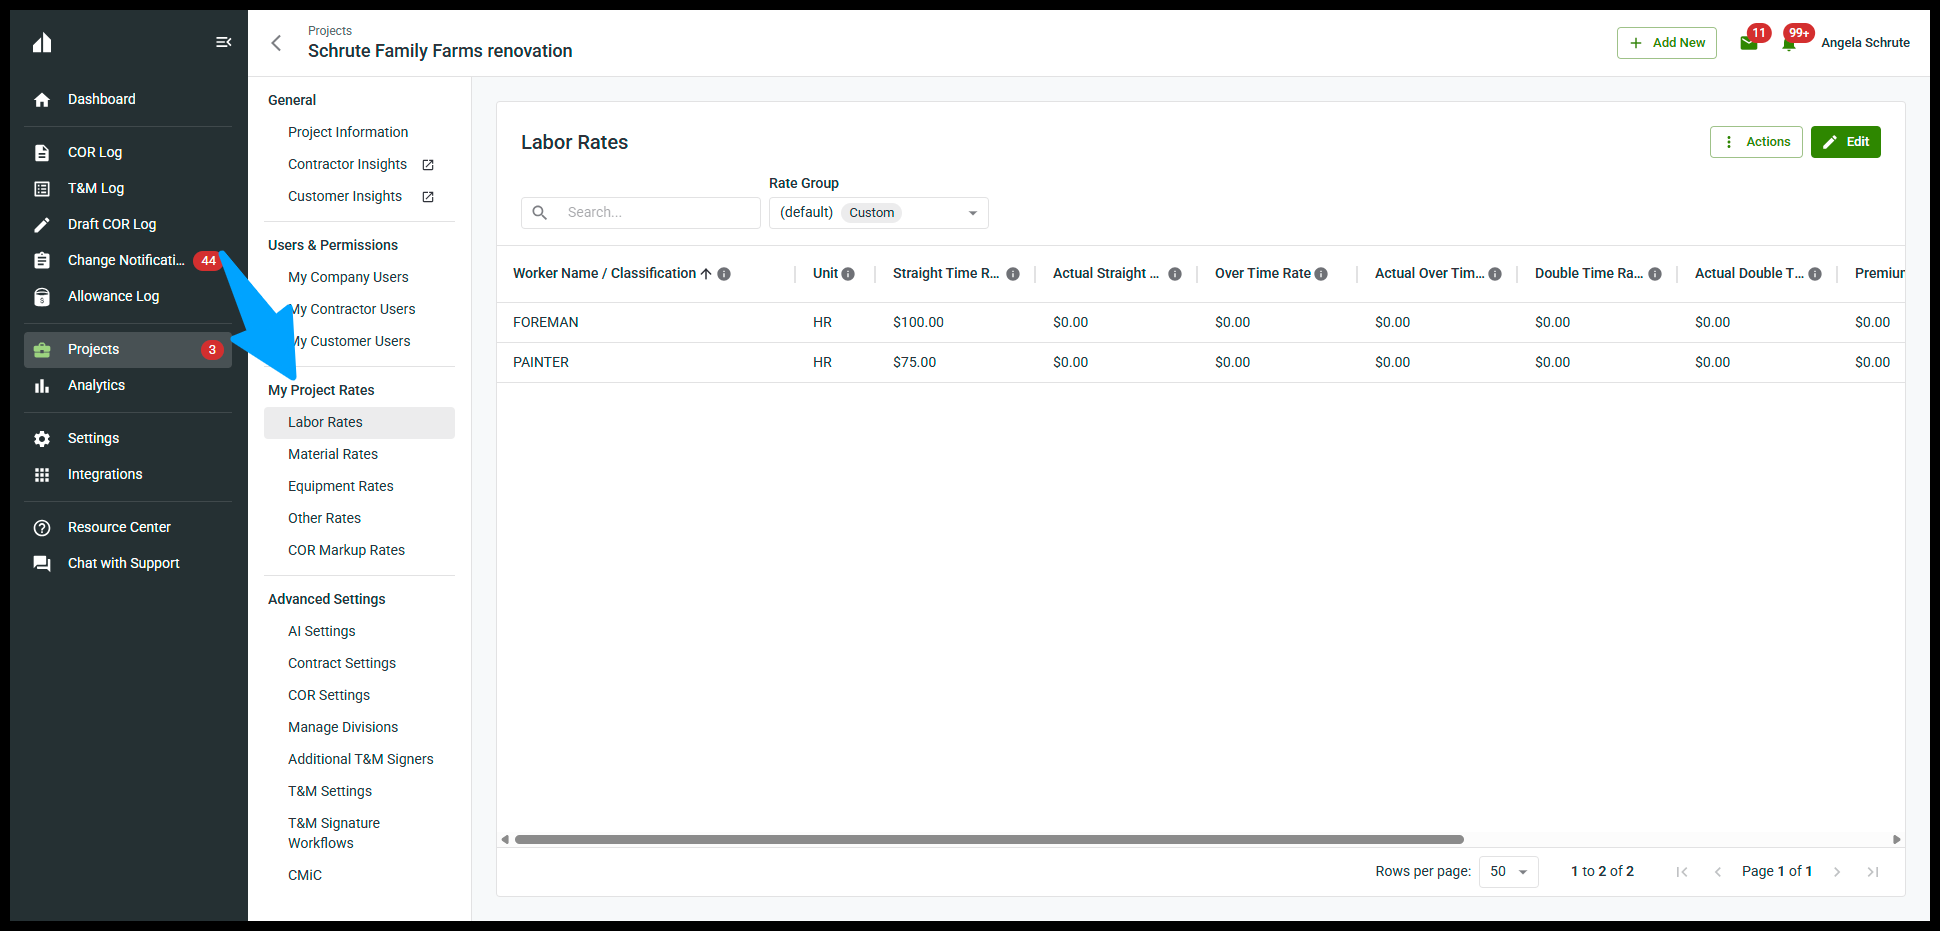
- Once you're in the project, locate My Project Rates in the left sidebar and click on the rate section you want to manage — Labor, Material, Equipment, Other, or COR Markup.

- By default, the Company Standard rate group for each section will already have been applied. You can confirm or change the active rate group using the Rate Group dropdown at the top of the table.
- Whatever you change and save here will be applied to all new T&M Tags and CORs created just for this project.
- Note: Any updates made to the project level will not affect the saved rate groups at the company level.
📋 Heads up: The Rate Group dropdown and project-level rate settings are only relevant if your company has configured rate groups or if you need rates that differ from your company standard. If you're just getting started, you can skip this for now.
Editing Rates Manually
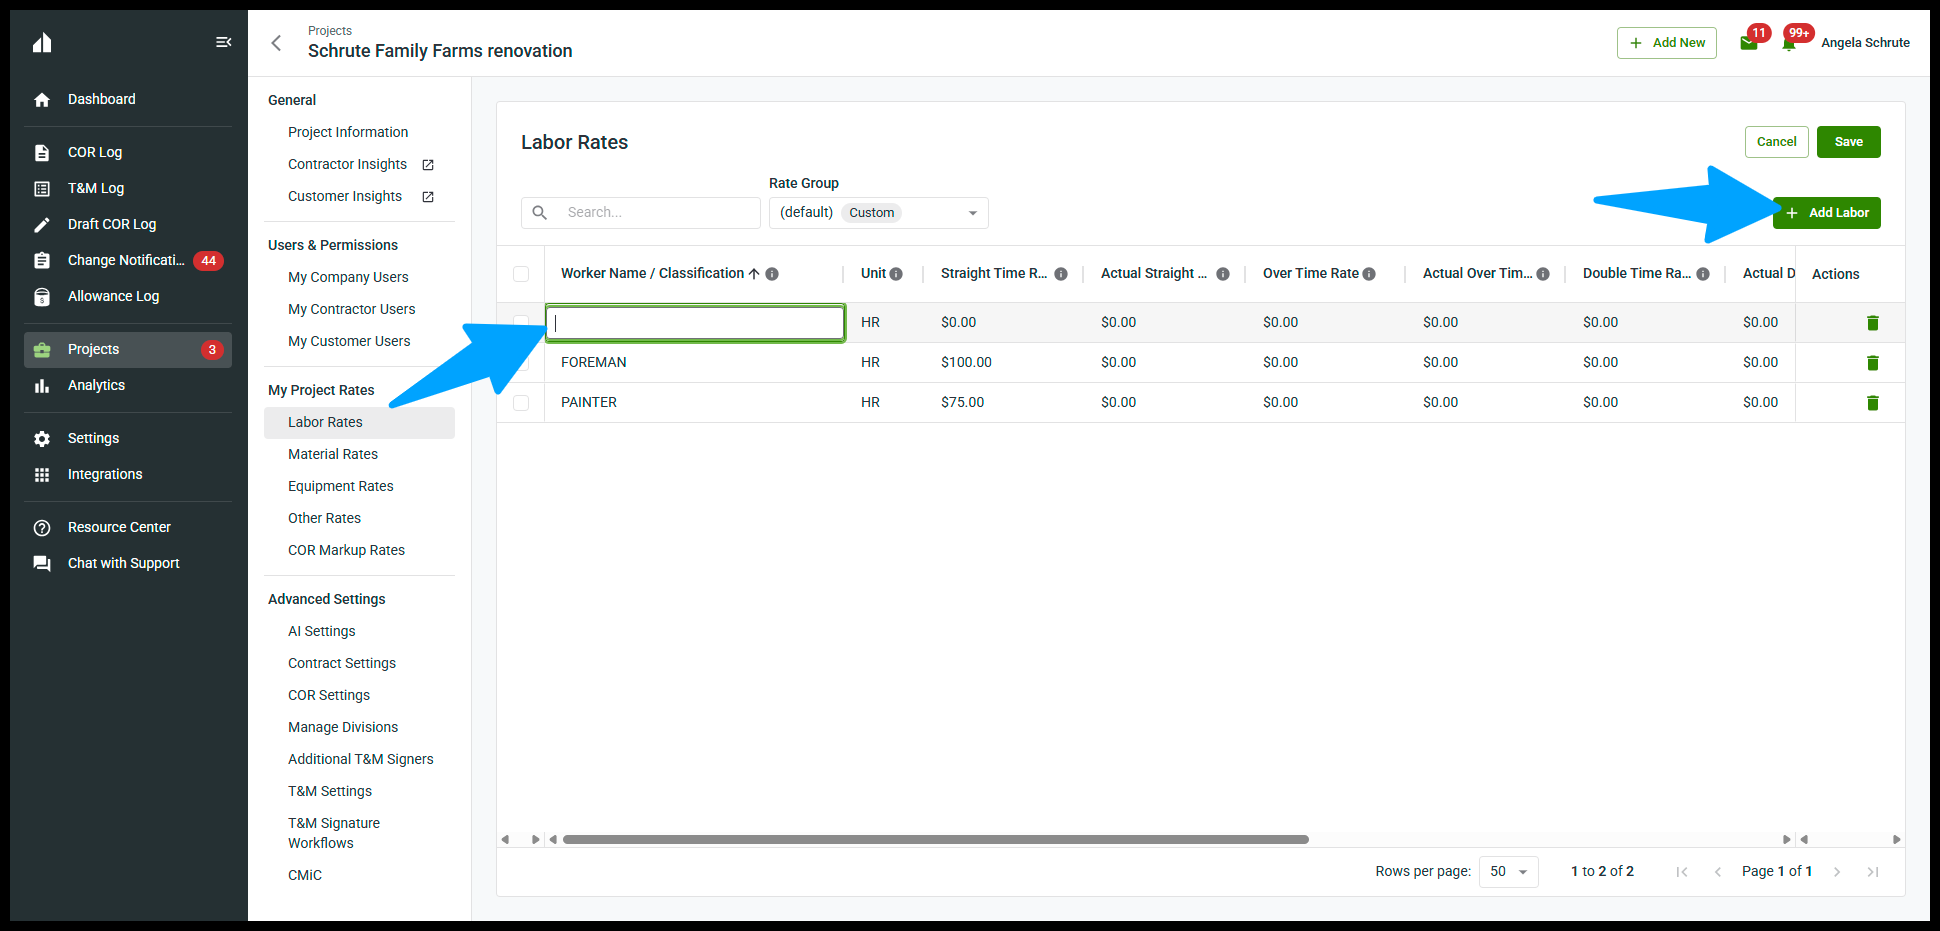
- Click the green Edit button in the top-right corner of the rate table to enter edit mode. The Edit button will be replaced by Cancel and Save buttons.

- Click into any field to edit an existing line item inline.
- To add a new line item, click the green + Add Labor button (or the equivalent button for the rate type you are editing, e.g. + Add Material).

- To delete a line item, click the trash icon in the Actions column on that row.
- When finished, click Save to apply your changes, or Cancel to discard them.

Importing and Exporting Rates
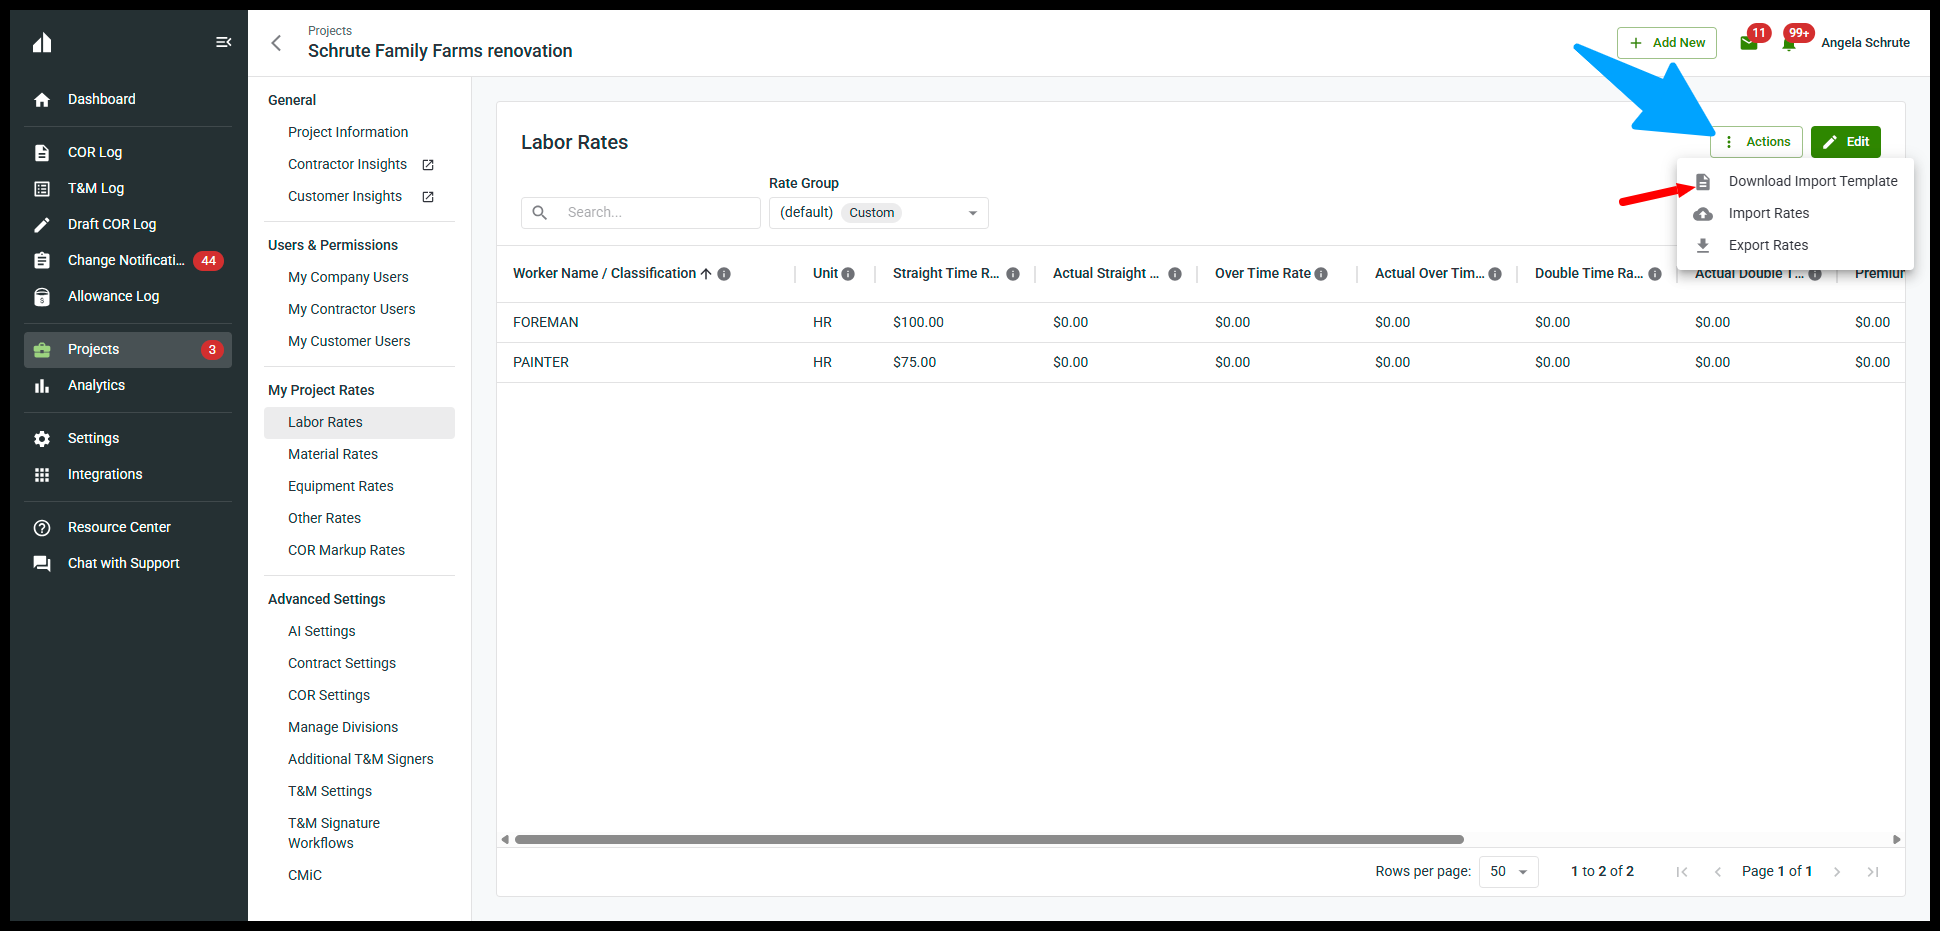
- To bulk manage rates via spreadsheet, click the Actions button in the top-right corner of the rate table. A dropdown will appear with three options:
- Download Import Template — If this is your first time importing rates, start here. Download the pre-formatted template, fill it in with your rate data, and use it when importing. Note: Imports will only work with Clearstory's template — do not use a custom spreadsheet.
- Import Rates — Upload your completed import template to populate the rate table in bulk.
- Export Rates — Download the current rate table as a spreadsheet.
Applying a Different Rate Group
- If your company has pre-configured rate groups, you can apply one to this project using the Rate Group dropdown at the top of the rate table.
- The table will update to reflect the selected group's rates.
- You can still edit individual line items after applying a rate group without affecting the saved group at the company level.