
Overview
Clearstory's digital COR Log replaces the email-and-Excel shuffle that buries Change Order Requests and loses you money. The log updates in real time, and every change is tracked in the Activity Feed, so both parties get a complete audit trail without anyone maintaining it by hand.
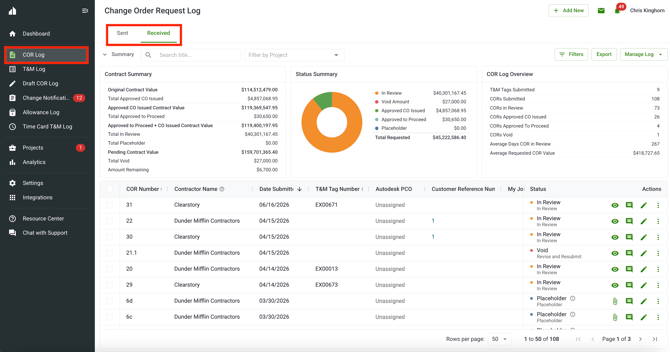
To open it, click COR Log in the left-hand navigation bar.
Table of contents:
- Sent vs. Received
- Reading the summary
- Understanding the columns
- Filtering the log
- Searching and sorting
- Managing the log appearance
- Exporting and sharing
- Acting on a COR
- Pushing to your ERP or PM tool
- Quick reference: statuses and stages
1. Sent vs. Received
You can both send and receive CORs in Clearstory. Invite your customer to receive the CORs you send, and invite your contractors to send CORs to you. There are two logs, and you toggle between them at the top of the page:
-
Sent COR Log: anything you send through Clearstory to your customer
-
Received COR Log: anything a contractor sends to you
Each log shows the columns that fit that direction. The Sent log shows your customer and how many times they have opened the COR. The Received log shows the contractor, the contract, and the Sent COR a received item is linked to.
2. Reading the summary
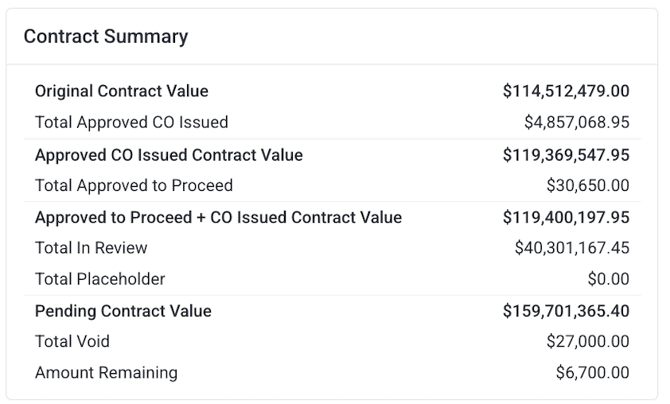
Above the log is a Summary panel that does the math for you:
-
Contract value for the selected projects
-
Requested COR value grouped by status (In Review, Approved to Proceed, Approved CO Issued, Void, Placeholder)
It is the fastest way to see your change exposure at a glance. Open or close it with the toggle, and Clearstory remembers your choice next time.
3. Understanding the columns
The log uses a standard layout so everyone stays on the same page. Here is what the key columns mean.
Identifiers
-
COR Number: auto-generated starting at 1 for each project. You can customize it if a project needs a unique numbering system.
-
Customer Name / Contractor Name: who you sent the COR to (Sent log) or who sent it to you (Received log).
-
Customer Reference Number: the number your customer (GC) uses to track the COR, often a PCO, PCI, or CE number.
-
My Job Number: your internal project number, set on the project details page.
-
Project Name: the project the COR belongs to.
-
T&M Tag Number: the linked T&M Tag number (Field Work Order, EWO, and so on). Enter it manually or pull it from a Clearstory Tag.
Dates
-
Date Submitted: when the first version of the COR was originally sent. Editable, so you can backfill CORs that were first sent outside Clearstory. Editing Date Submitted on a revised COR will update the Date Submitted for all versions of that COR. Changes are tracked in the Activity Feed.
-
Revision Date: The date this specific revision was submitted. On the original COR, Revision Date is blank. On each revision (v2, v3, …), Revision Date shows the date that version was submitted. This field is editable, and changes are tracked in the Activity Feed.
-
Approved/Void Date: the date a COR was verbally or in-writing approved or rejected. This is not the CO issue date.
-
CO Issue Date: the date the signed Change Order was issued.
Dollar values
-
Requested Amount: the original requested amount. It only changes when the sender submits a revision. If a price gets negotiated, edit the status amount instead.
-
Status totals (Approved CO Issued, Approved to Proceed, In Review, Void, Placeholder): the requested value sitting in each status.
-
Amount Remaining: the requested amount minus the amount in its current status. A quick flag for pricing disagreements.
Status and tracking
-
Status / Stage: the current approval state and its sub-stage (see the quick reference below).
-
Customer CO Number: the formal signed Change Order number from your customer. Required to mark a COR Approved CO Issued. Several CORs often roll up into one signed CO.
-
Responsible Party / Ball in Court: who owns the next move.
-
Days In Review / Days Aging: how long a COR has been in review or sitting open.
-
Labels: internal category tags (overtime, trade damage, design changes, and so on). Filter by them anytime. Labels are visible only to your company, never to your contractors or customers.
Depending on your account, you may also see allowance columns, reason categories, percent complete, file views, and a column per connected integration showing its link state.
4. Filtering the log
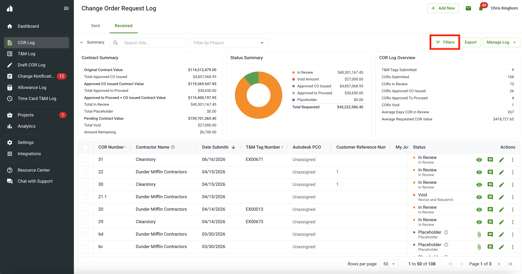
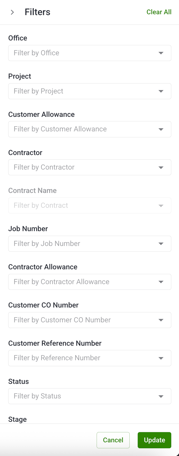
Click Filters in the top right to narrow a busy log. Filters stack, so combine as many as you need:
-
Project, Division, Office, Region, User
-
Customer or Contractor, Contract, Job Number
-
Status and Stage
-
Responsible Party, Ball in Court, Label
-
Customer Reference Number, Customer CO Number
-
Date Submitted range- Reason Category, Backcharges, and CORs with or without T&M Tags
-
Customer and Contractor Allowance
-
Per integration (Procore, CMiC, Sage 100, Vista, Sentinel, and more) to find what is linked, unlinked, or needs an update
Some filters only appear when the matching feature or integration is turned on for your account.
5. Searching and sorting
Search by title to jump straight to a COR by name.
Click a column header to sort. Sorting and paging run on the server, so your order holds even on large logs, and your page size sticks between visits.
6. Managing the log appearance
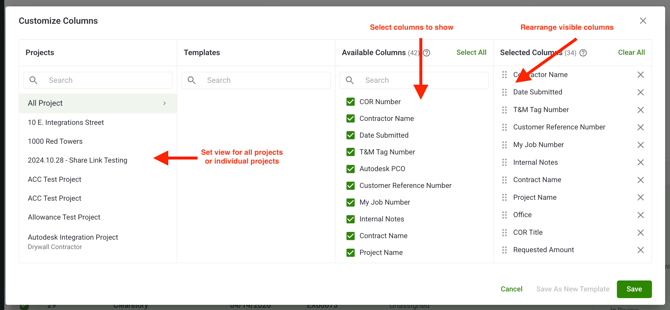
You can customize the log directly by dragging and dropping columns into the order you prefer, or by dragging the edge of a column to adjust its width. You can also control the overall look of your log by using templates.
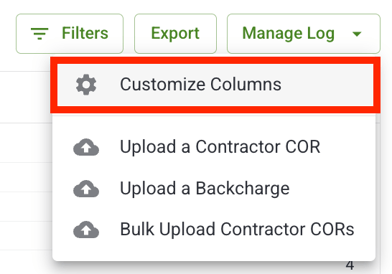
Open Manage Log in the top right to control what you see:
- Show or hide columns
- Drag to reorder
Save a template. Built a setup you want to reuse? Save it as a named template, then apply, update, or delete it anytime. Templates are scoped to an office. If your selection spans projects in more than one office, template creation pauses until you narrow to a single office.
7. Exporting and sharing
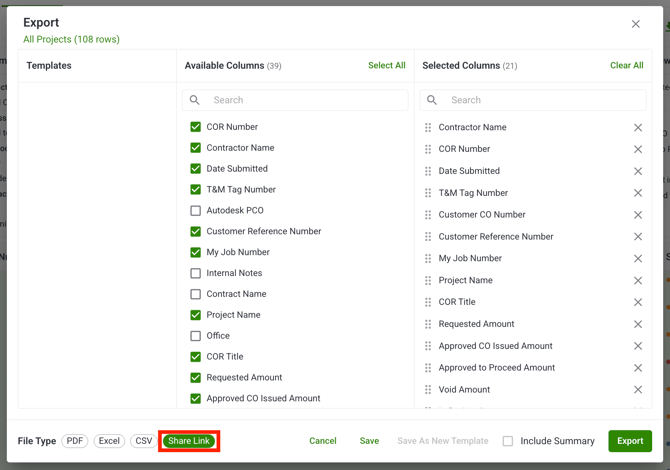
Click Export in the top right to share or save the log. Pick your format:
-
PDF: clean and presentation ready (limited to 2,500 rows; above that, use Excel or CSV)
-
Excel: for working the numbers
-
CSV: for imports and raw data
-
Share Link: a live, always-current view you can email to a customer with no Clearstory account required
A few things worth knowing:
-
Choose exactly which columns to include, and drag to set their order.
-
The Include Summary option adds the summary roll-up to PDF and Excel exports.
-
A Share Link needs at least one project selected before you generate it.
-
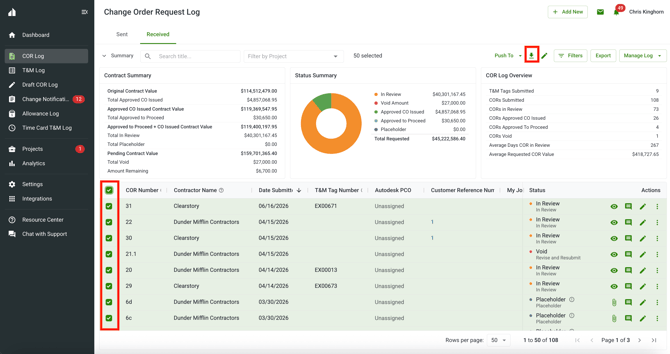
To download the actual COR PDFs, check the rows you want and click the bulk download icon.
8. Acting on a COR
Every row has actions so you can keep moving without leaving the log:
-
View the COR PDF
-
Edit with the pencil: update fields like Date Submitted, Customer Reference Number, status, dates, Customer CO Number, and Labels without regenerating the COR PDF
-
Submit Revision (CORs built in Clearstory) or Upload a Revision (uploaded CORs): this updates the PDF and notifies your customer
-
View Versions and View Activity
-
Resend a copy of the COR to anyone
-
Create a Backcharge
-
Mark a COR approved:
-
1. Click the pencil to open the edit panel.
-
2. Set the Status dropdown.
-
3. For Approved CO Issued, enter the Customer CO Number and CO Issue Date (both required).
-
Confirm.
-
- Copy COR: start a new COR pre-filled from this one, in the same project (see Copy a Change Order Request (COR)). Disabled with a tooltip if the COR has linked T&M tags.
(Not every action is listed here — the menu contents depend on your license and the state of the COR.)
When you set Approved to Proceed, Approved CO Issued, or Void, the Approved/Void Date fills in with today's date. You can edit it.
9. Pushing to your ERP or PM tool
If your account is connected to Procore, CMiC, Sage 100, Vista, Sentinel, or a custom app, each row shows where it stands:
-
Assigned: linked and current
-
Unassigned: not yet linked
-
Update Required: linked, but something changed and needs a re-push
-
Syncing / Failed: for integrations that sync in the background
Push a COR straight from the log to keep your systems lined up. No double entry, no guessing whether it made it across.
10. Quick reference: statuses and stages
Status and when to use it:
-
In Review: Default for every new COR
-
Approved to Proceed: You have the go-ahead (verbal or written), but no signed CO yet
-
Void: Rejected or no longer being pursued
-
Placeholder: Not formally submitted, tracked for forecasting
That is the COR Log. One log, current for everyone, with the filters, templates, and exports to get your answer in a few clicks.