1. Create a New Project
.png?width=688&name=Create%20Project%20-%20(1).png)
Follow this link for detailed instructions on How to Create a New Project.
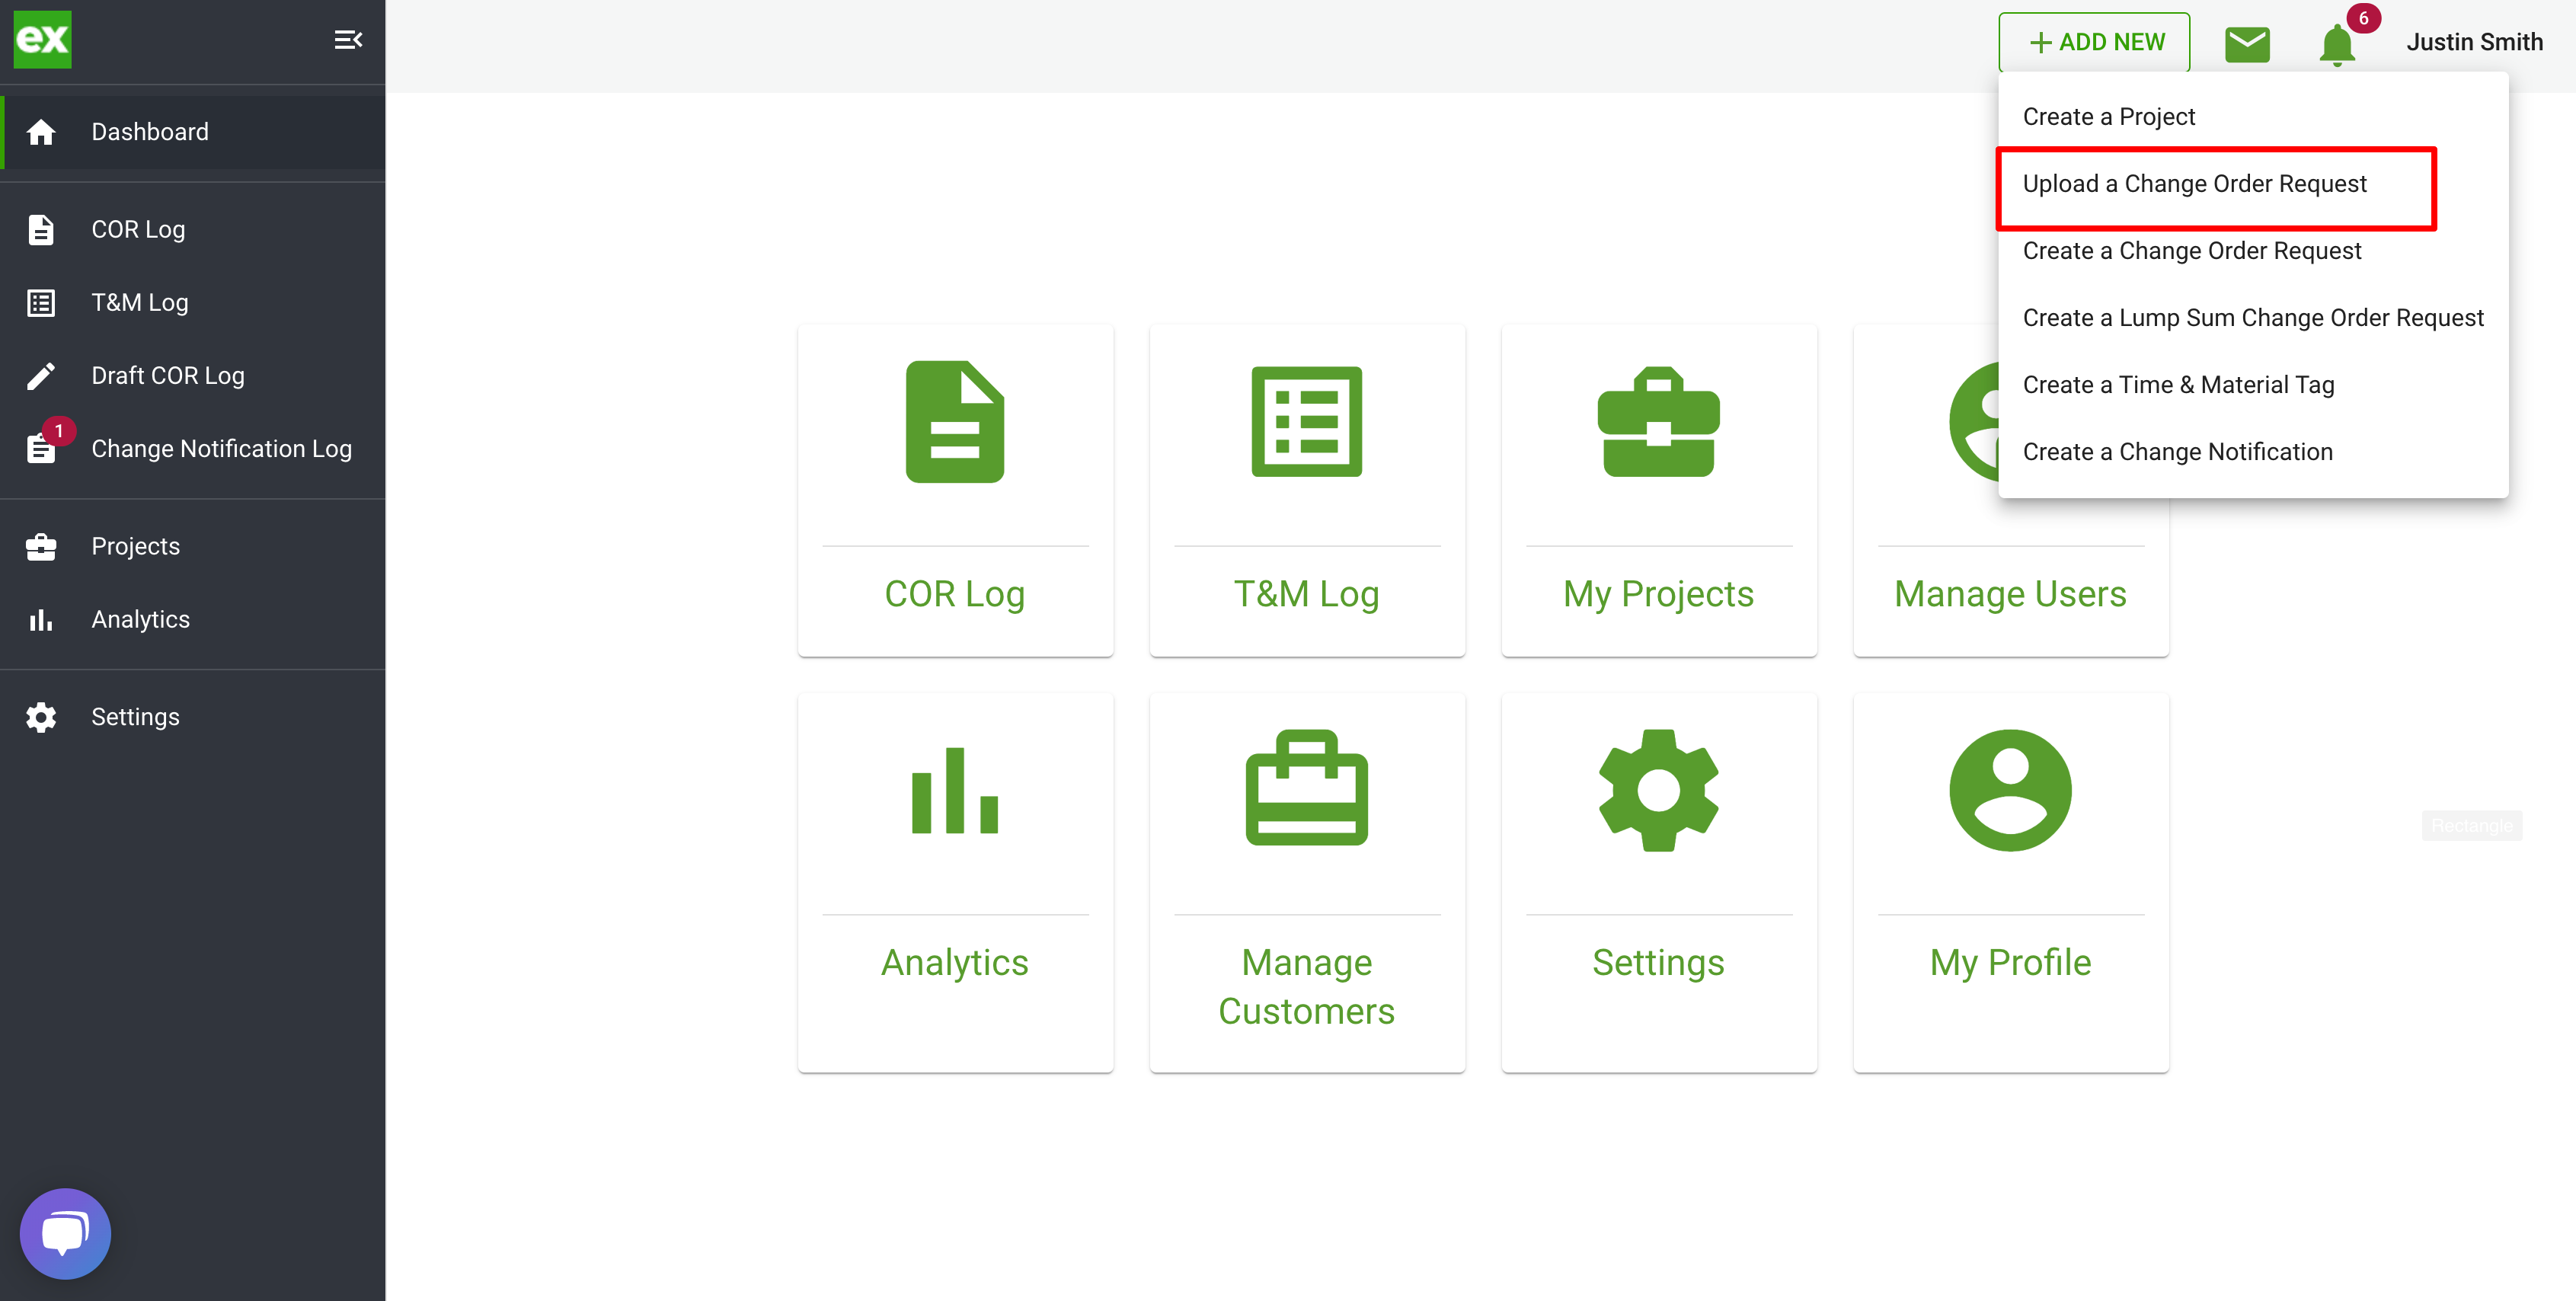
2. Upload COR
- Select + ADD NEW on the top of the screen and select Upload a Change Order Request from the drop down menu.
- Once on the page, you should see this screen.
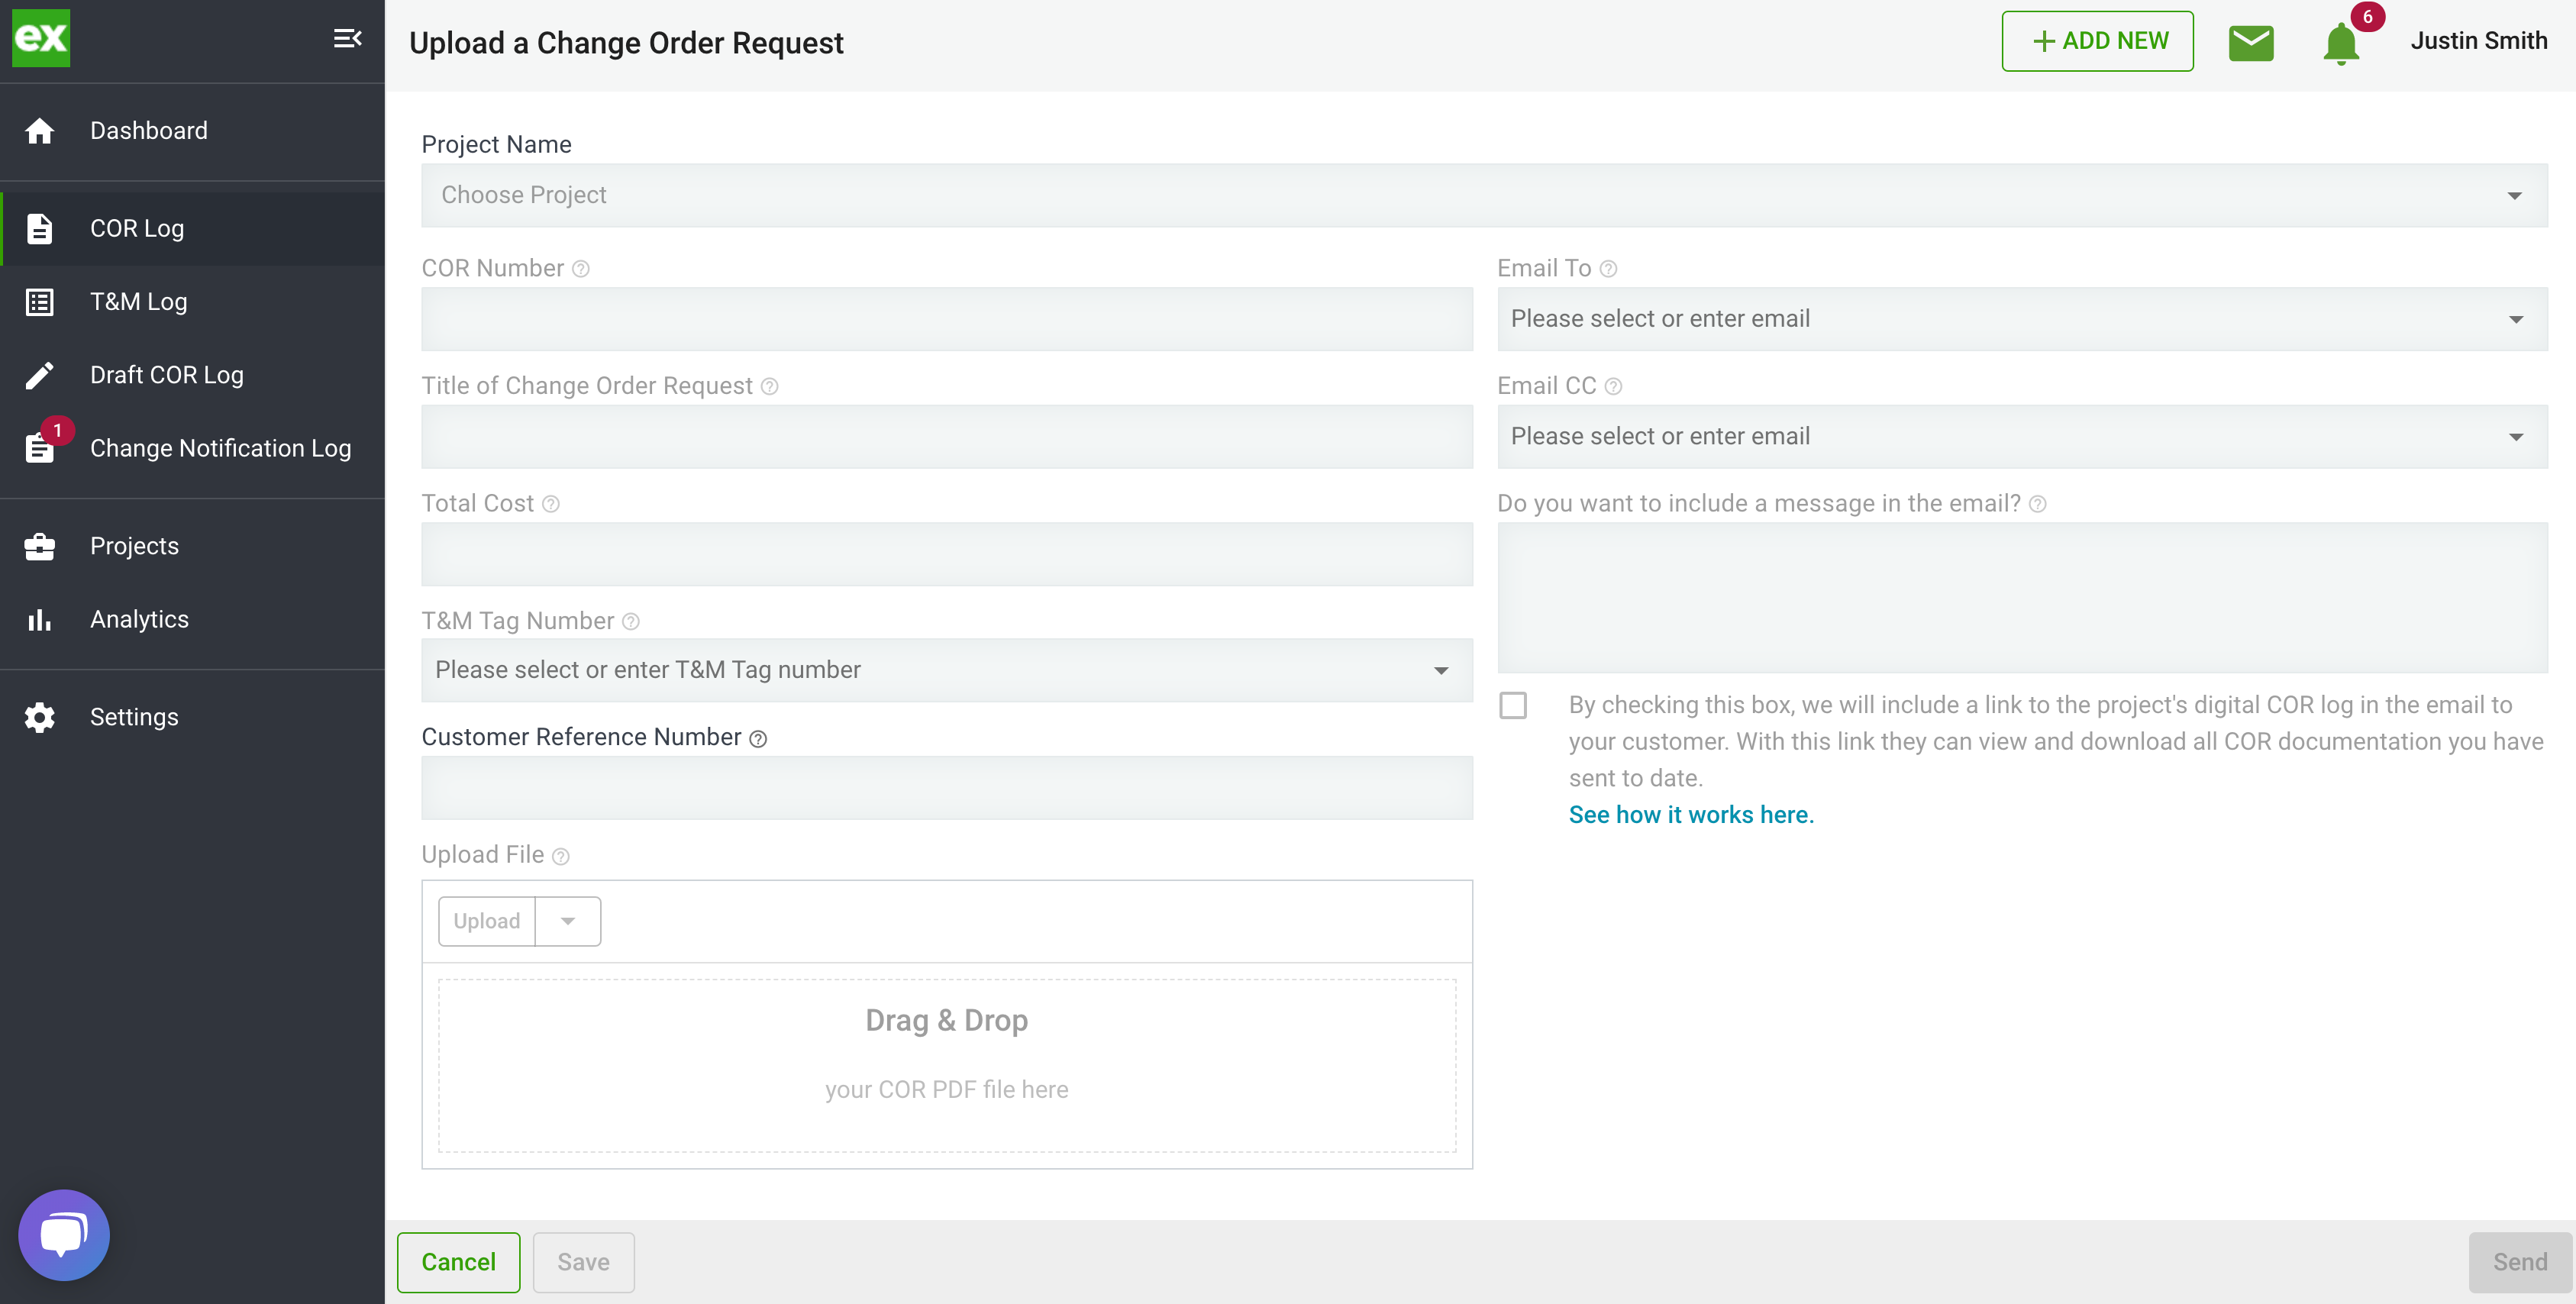
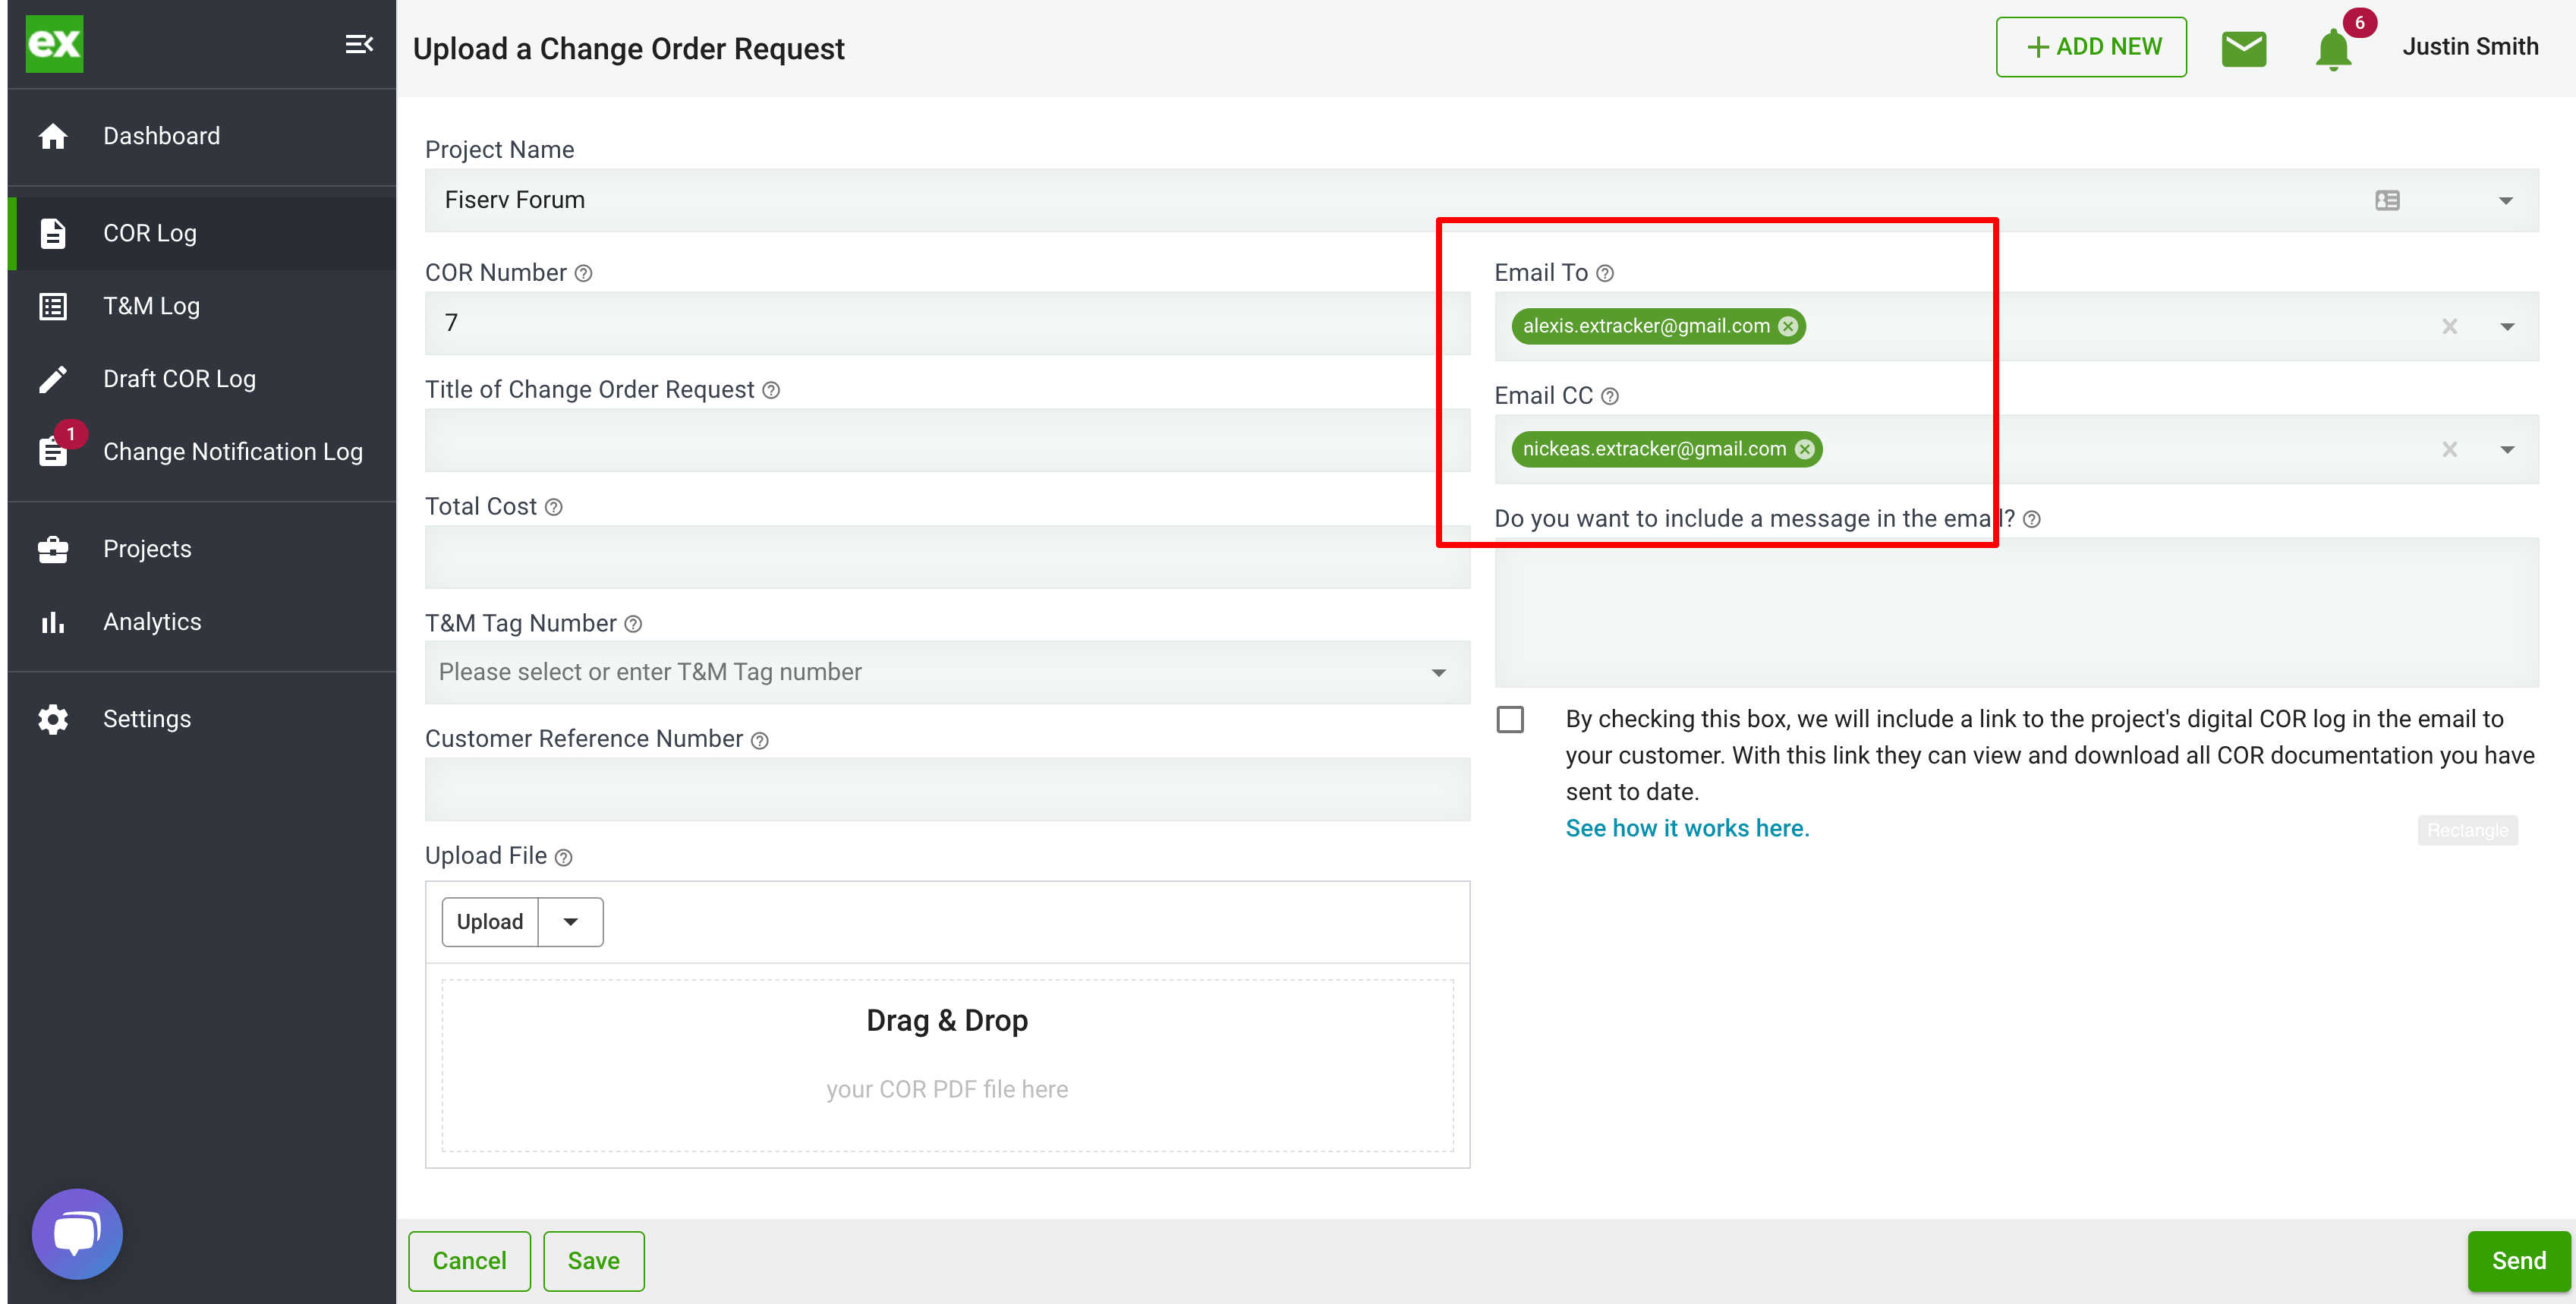
- Start by selecting the project.
- Once the project is selected you will see your customer's email populated in the Email To section. Remove these emails so the COR's are not sent to your customer again.
- Clearstory will populate the next available Change Order Request Number based on what has already been submitted for that project. You can override this number if you have a unique numbering system but we recommend numbering your CORs sequential by project 1-10.
- Please Note: We recommend uploading the COR's in order as they were originally created so they are numbered in the correct order in Clearstory.
- The Change Order Request Title is an abbreviated description of the COR. This will be the summary shown on the log. This Title should give your customer an understanding of what the COR is at a quick glance.
- The Total Cost is a lump sum of the total requested amount in the COR.
- Add a Customer Reference Number if your General Contractor gives you a PCO, PCI, CE, etc. number to track the COR against.
- Drag and drop your COR file that you want to send here.
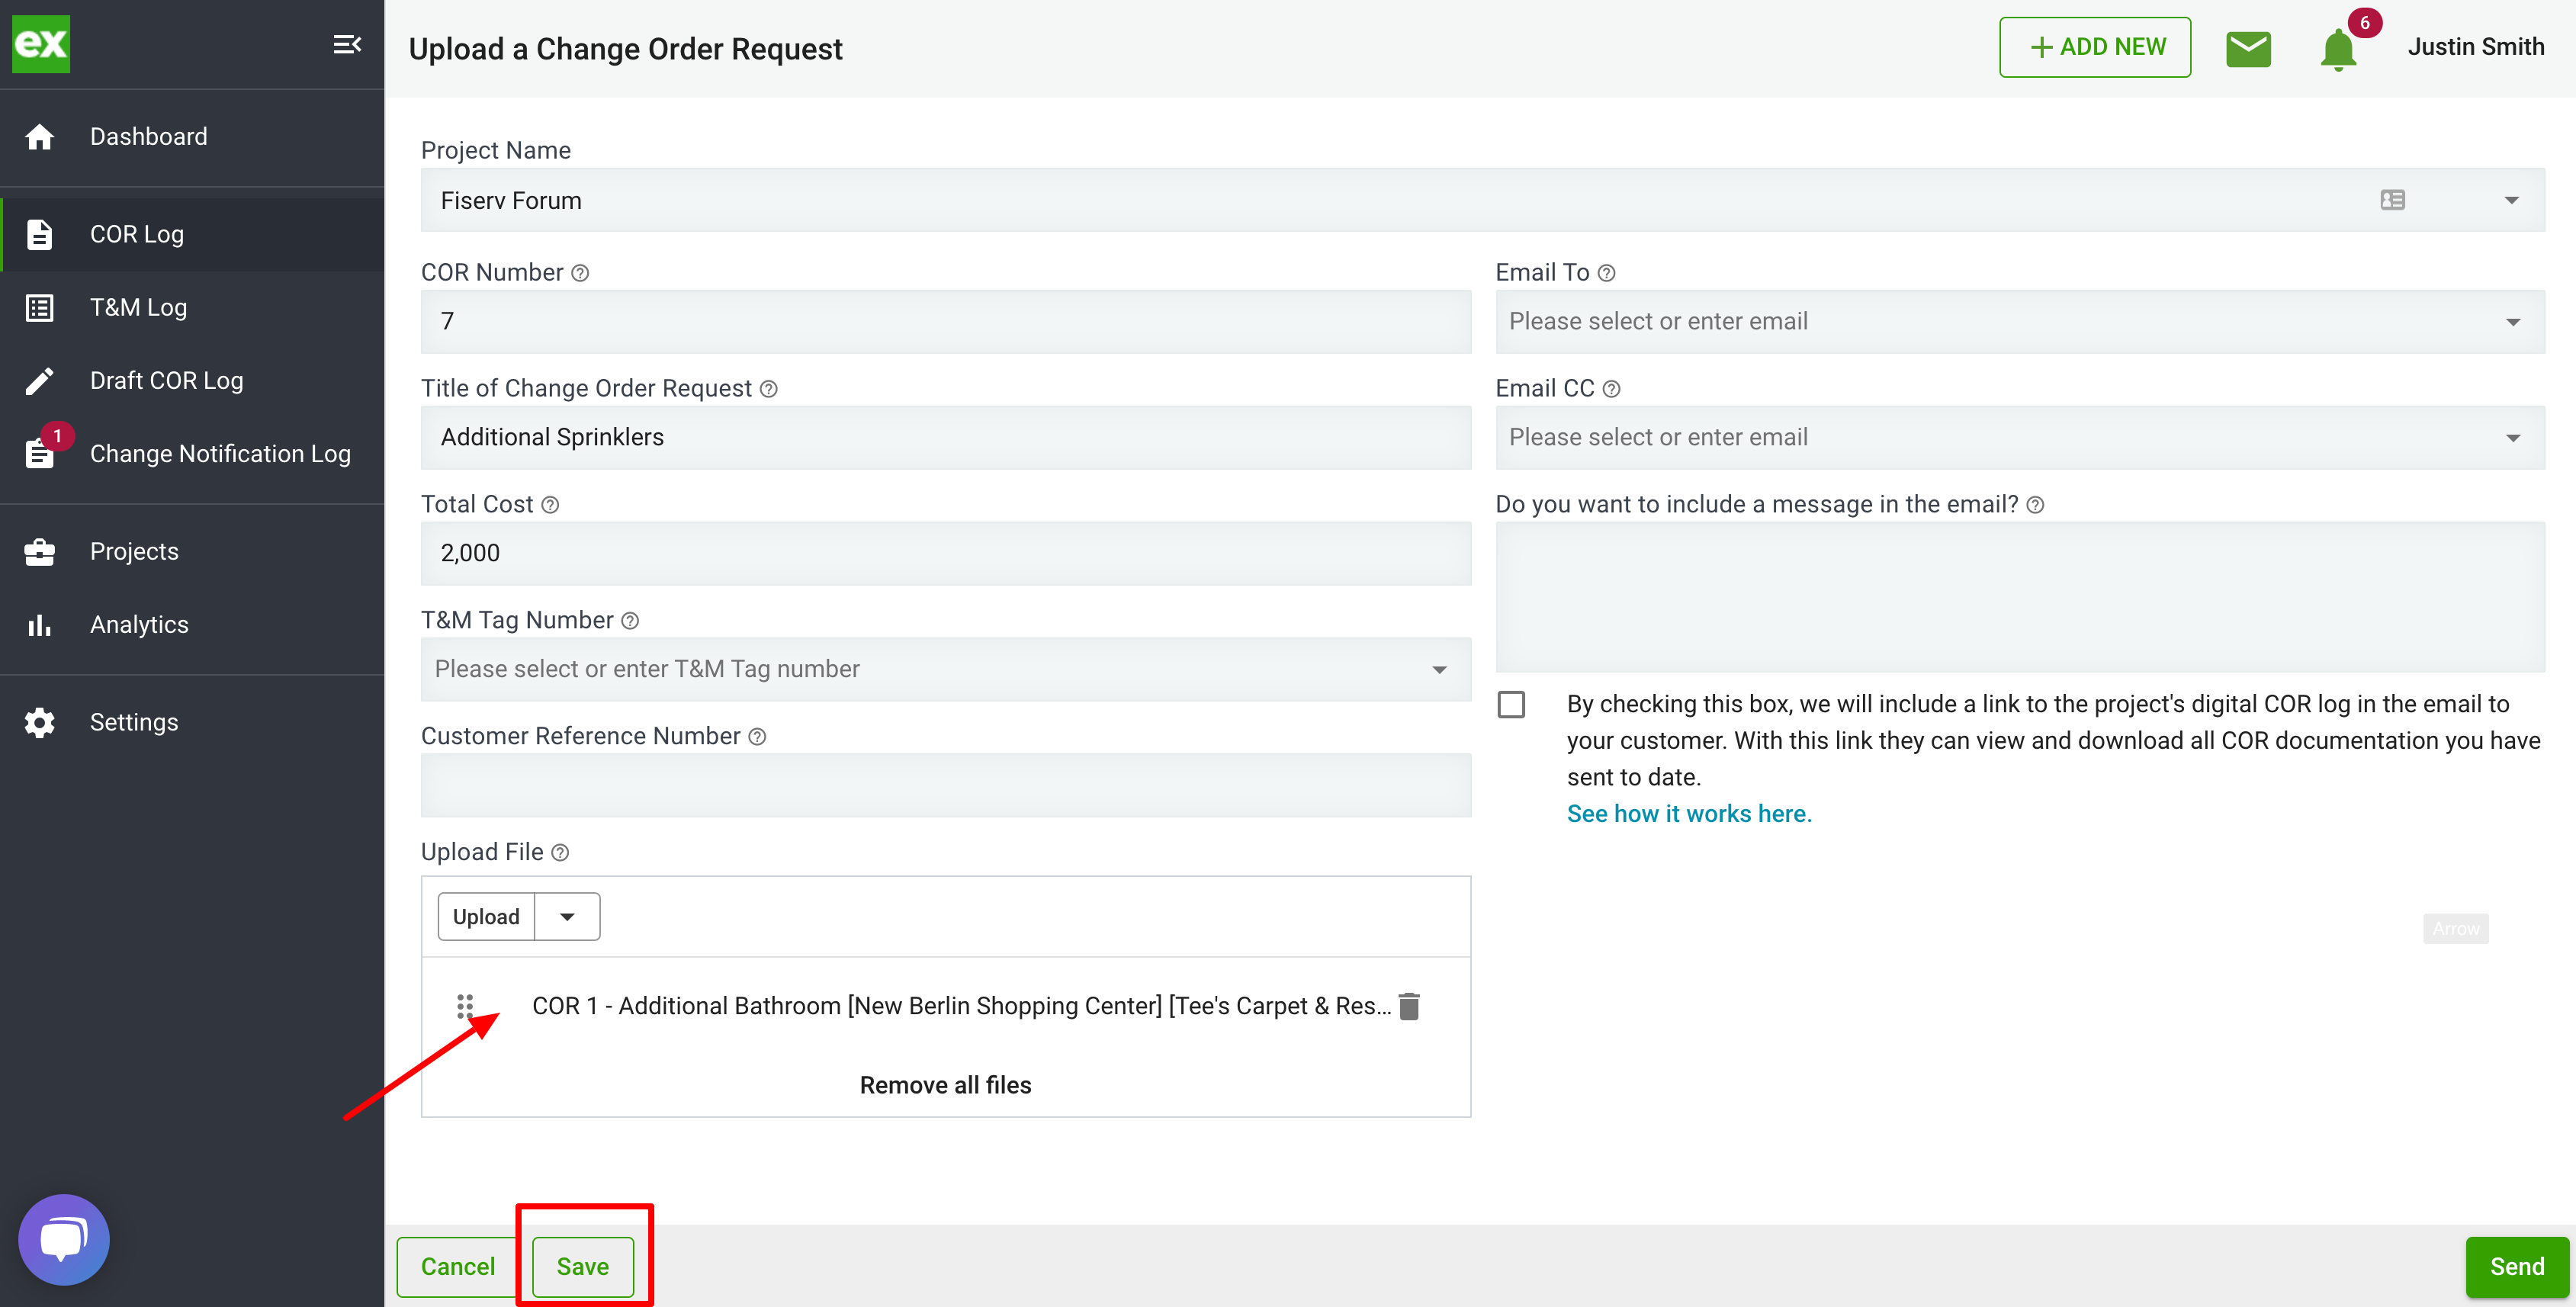
- The last step, if the form is completely filled out click save. This COR will be added to the digital COR log.
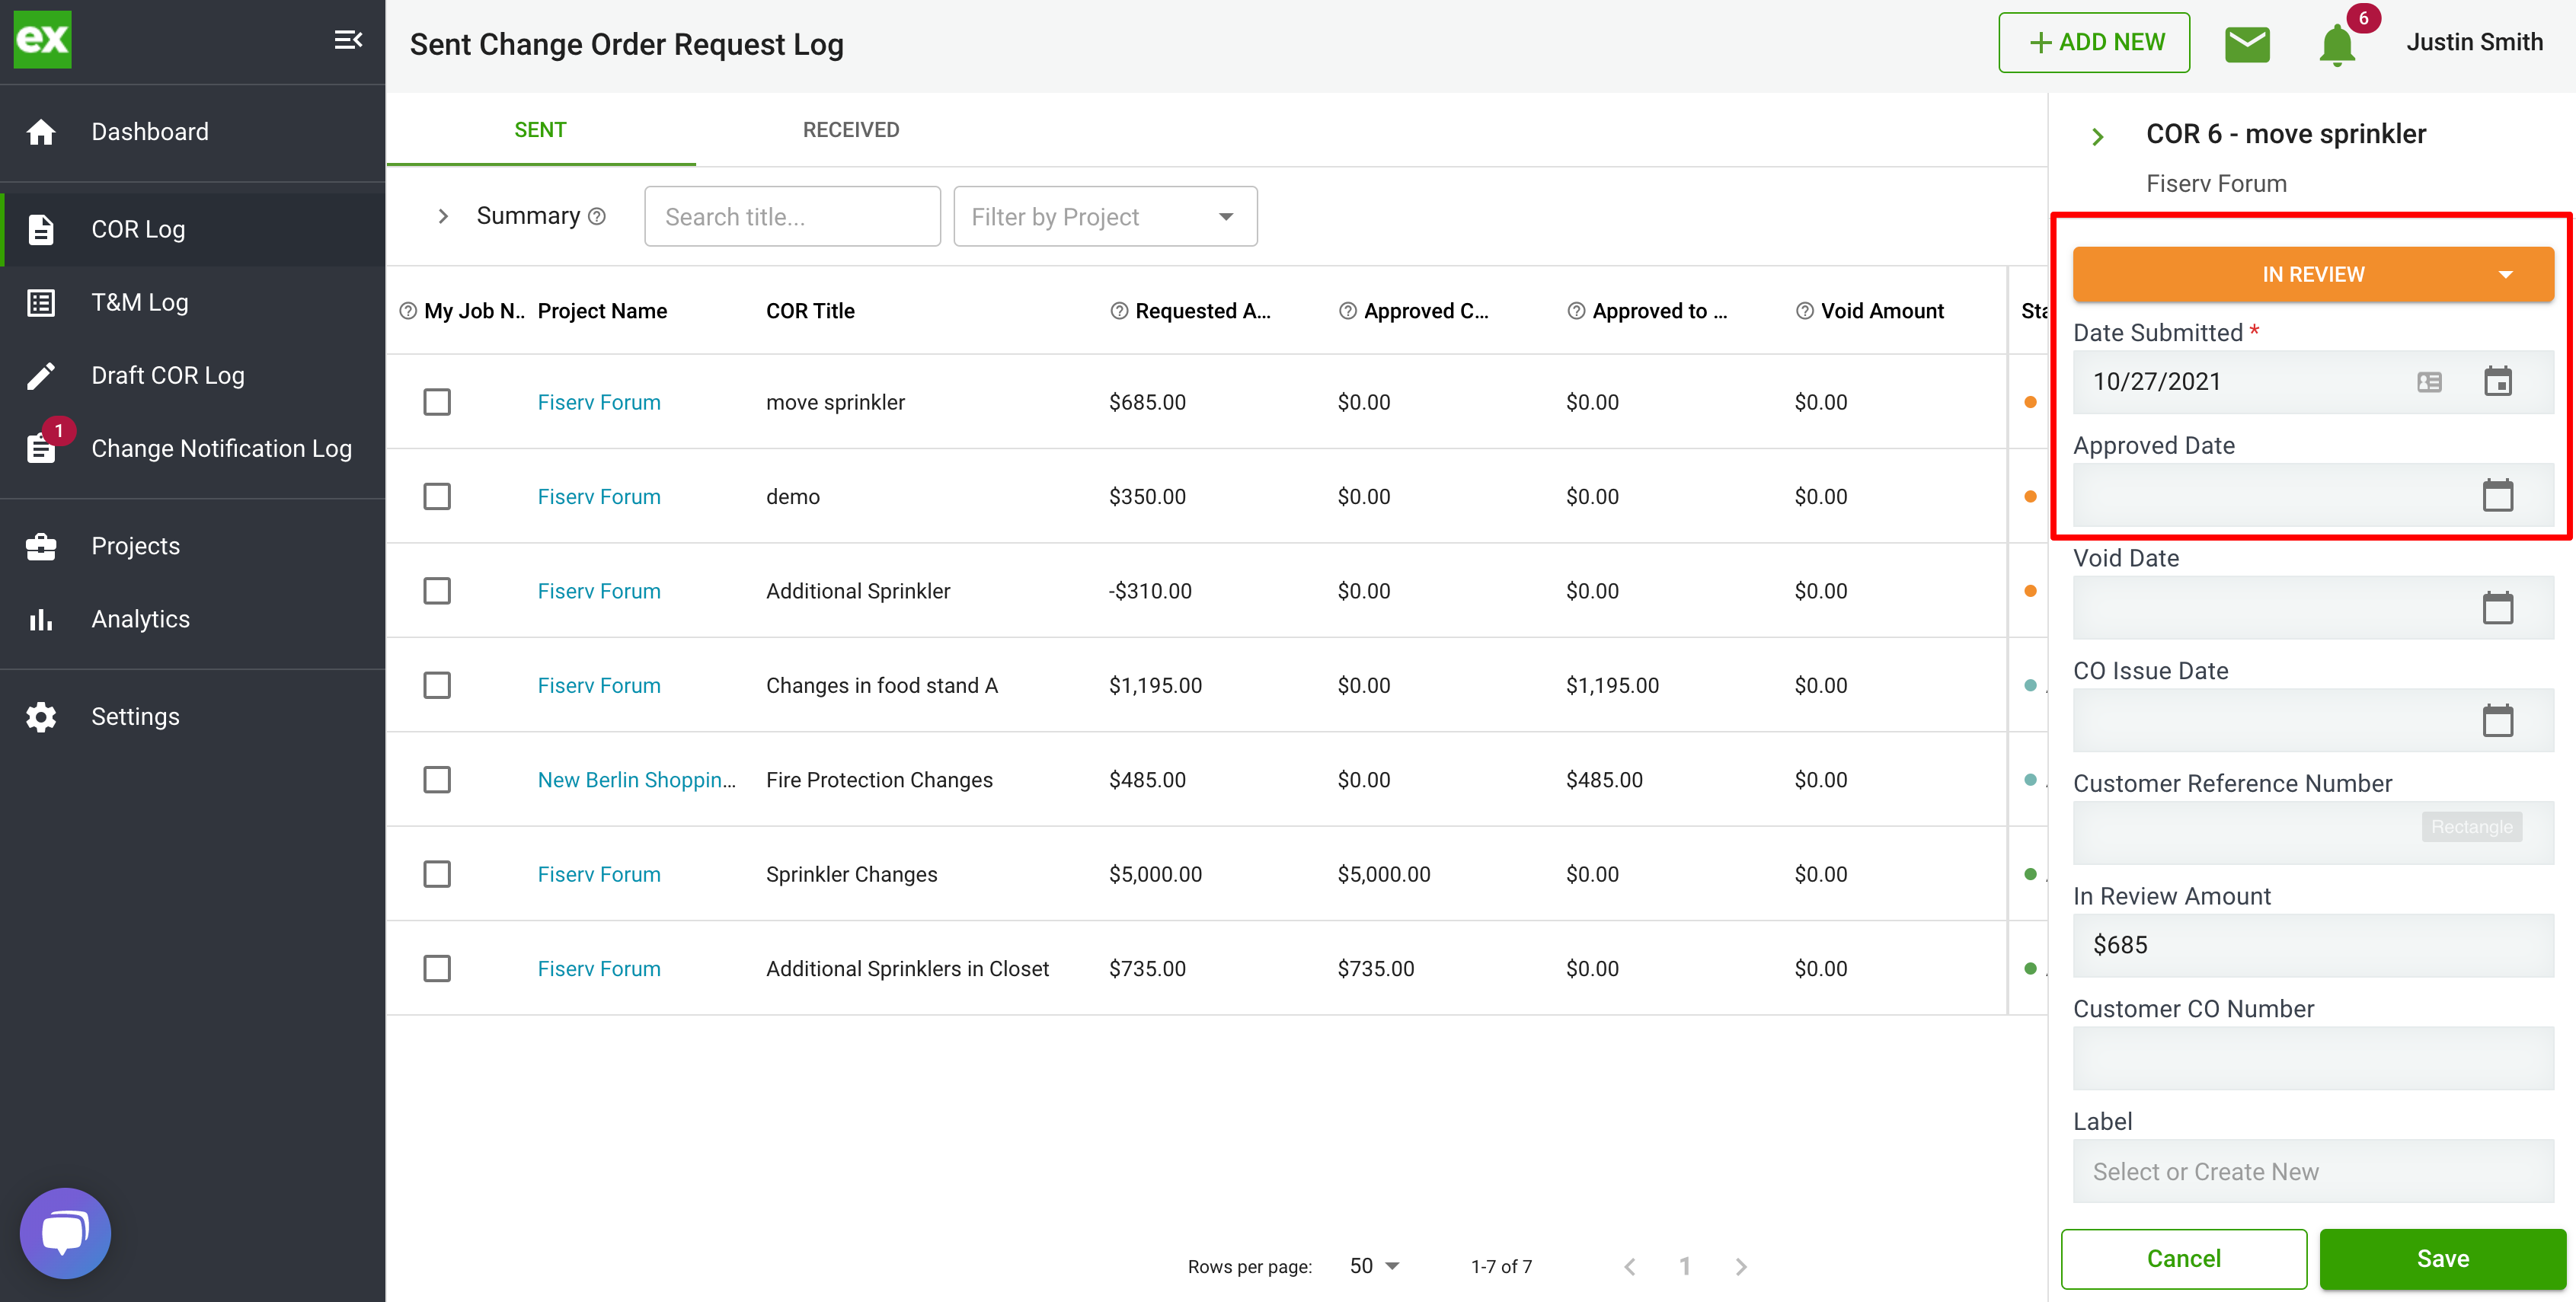
3. Update COR Log
- Select the pencil on the change order you uploaded
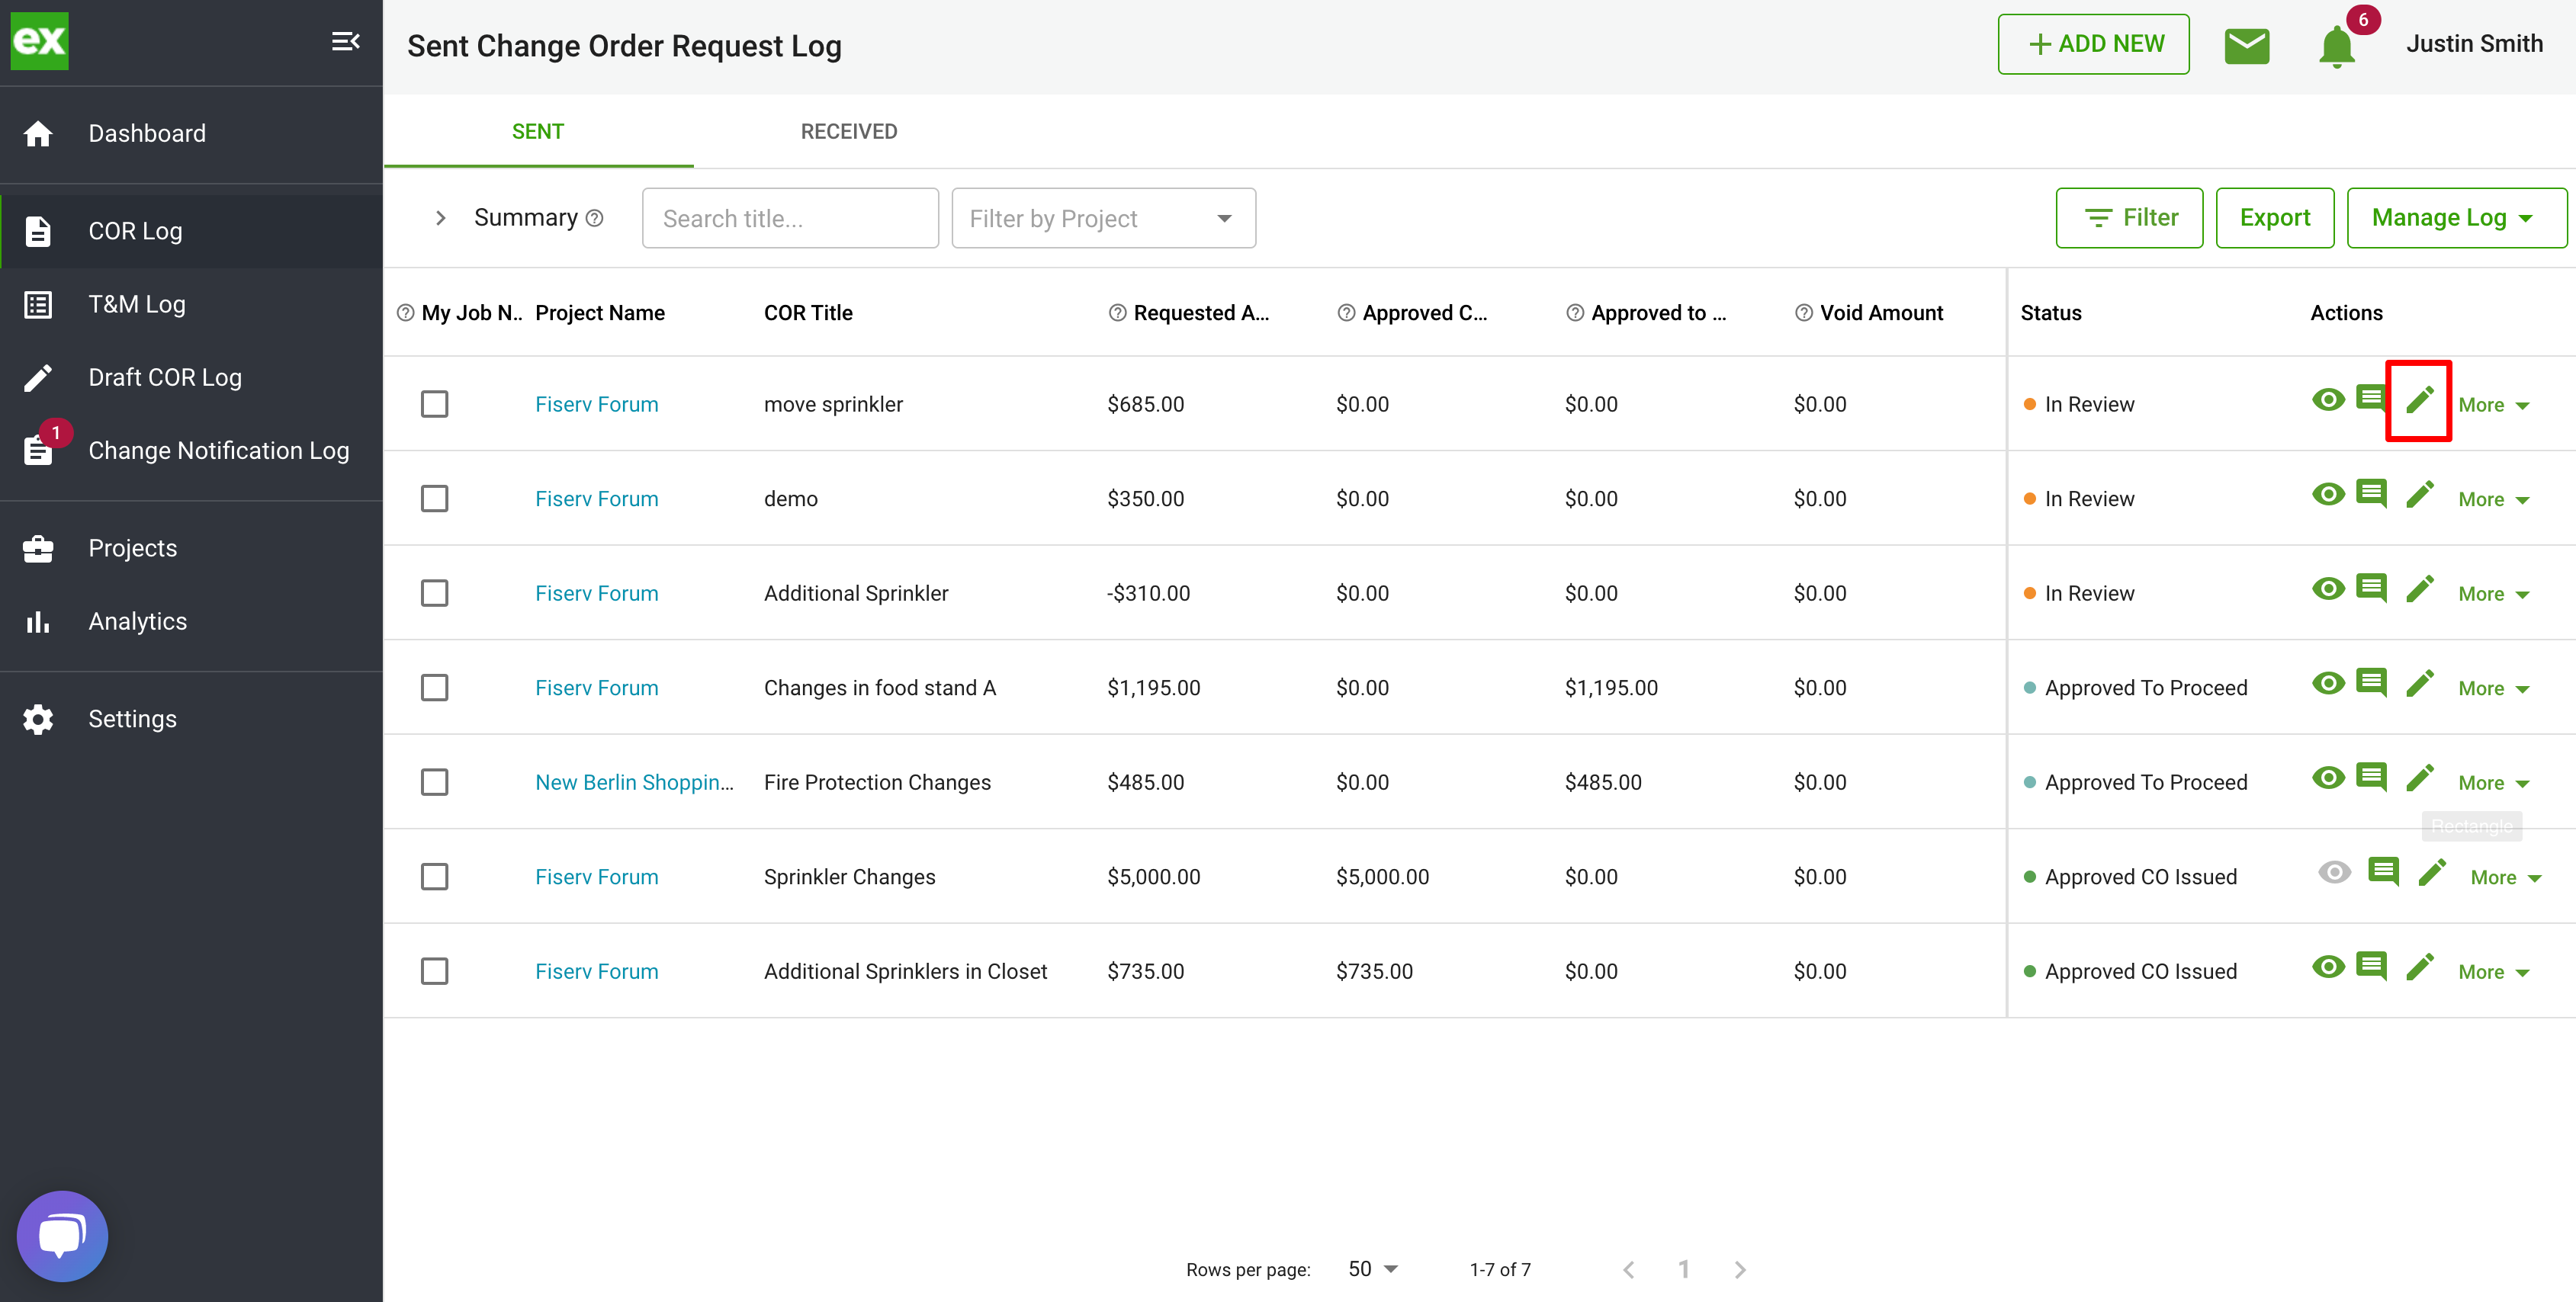
- Update the actual submitted date, status, and approved date (if applicable)