Locate your Received COR that needs to be Backcharged to another contractor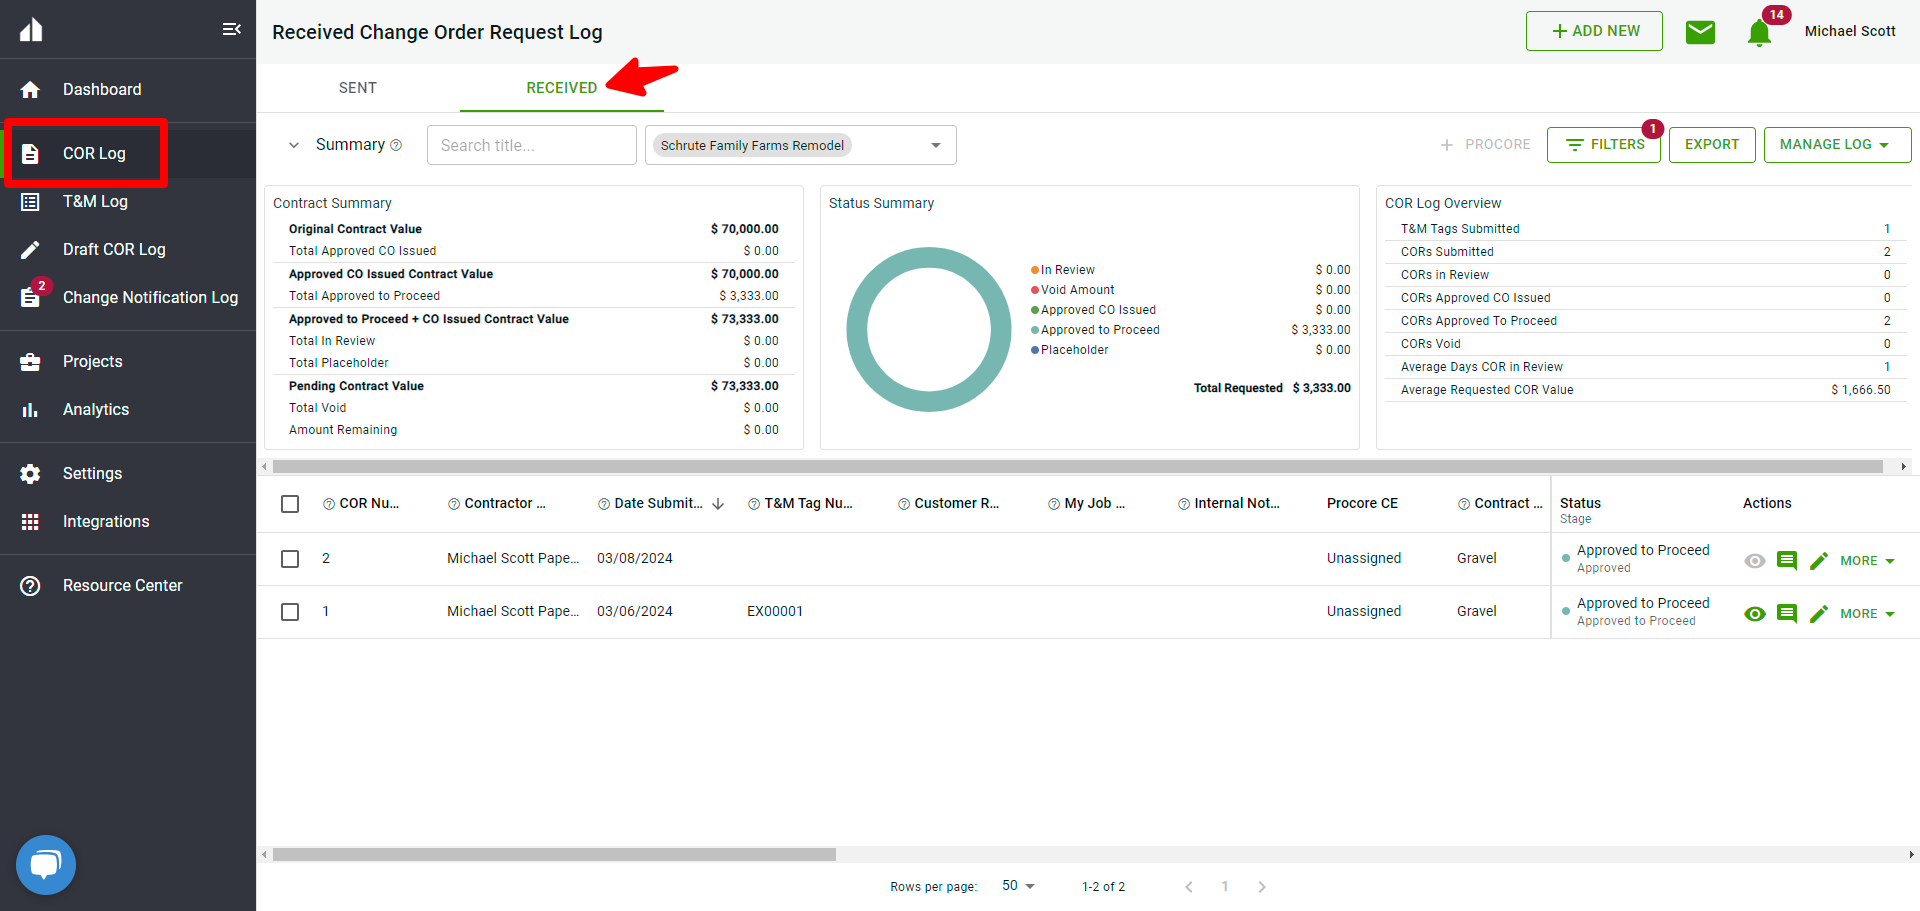
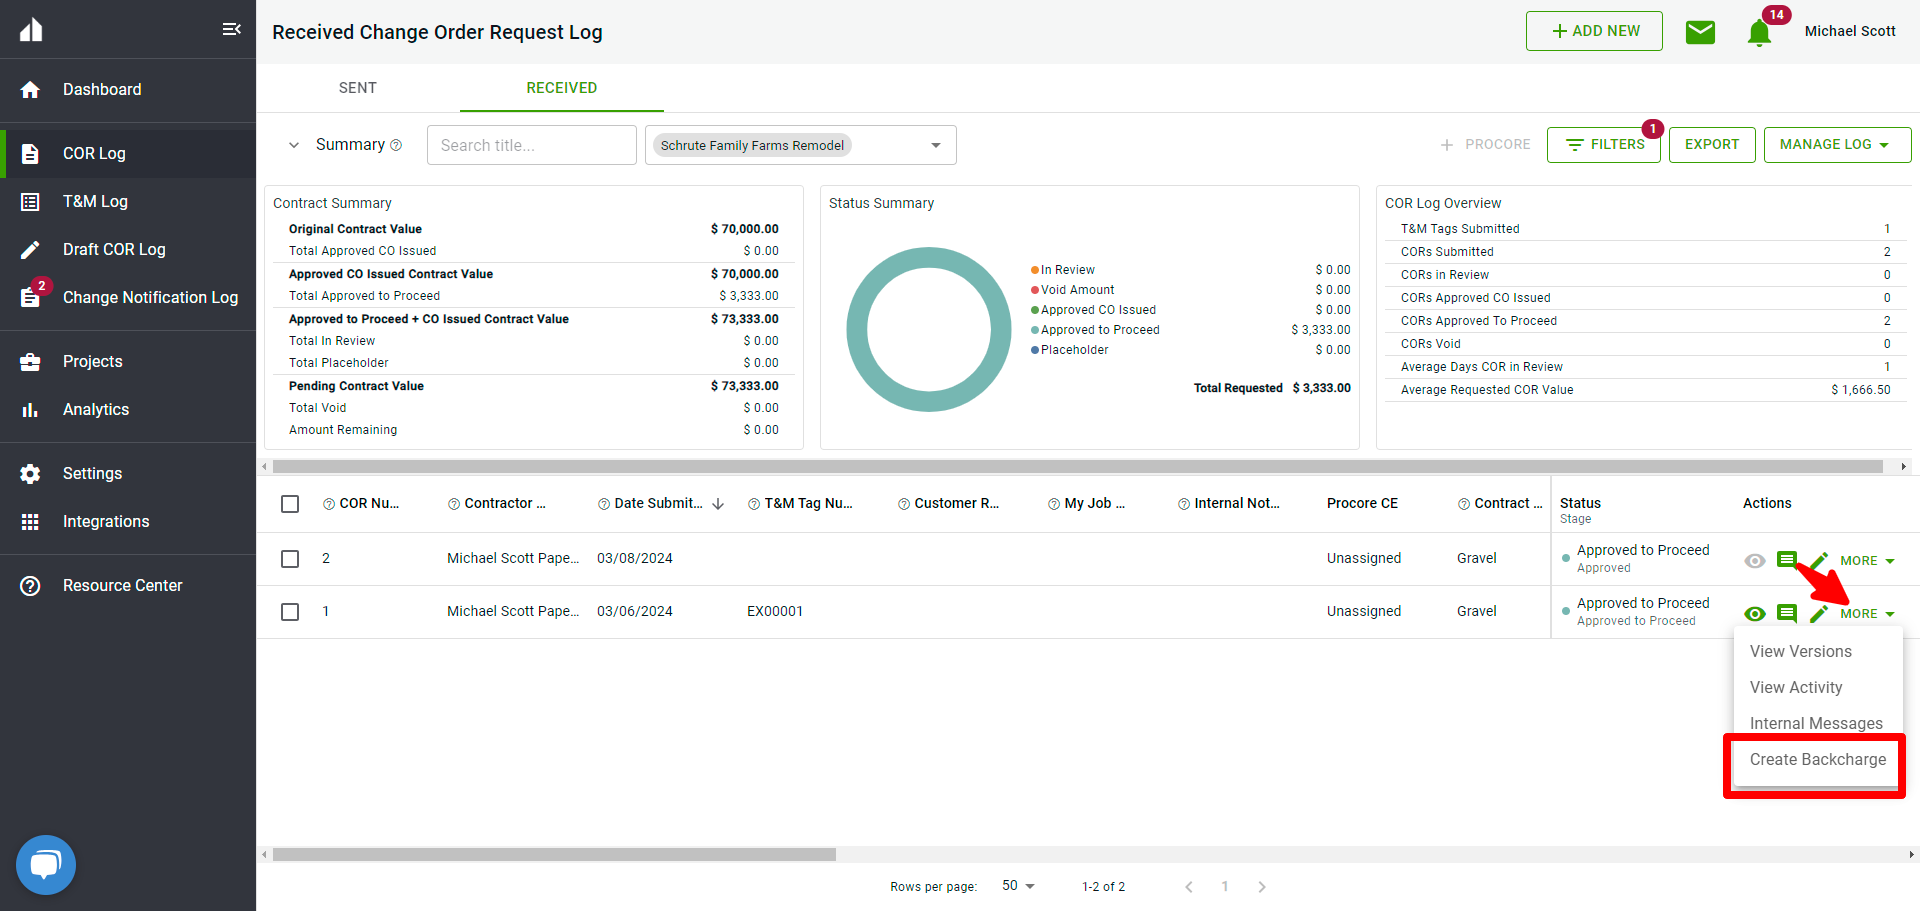
Click More and select Create Backcharge
The Create a Backcharge screen opens. Complete the relevant fields and click Create:
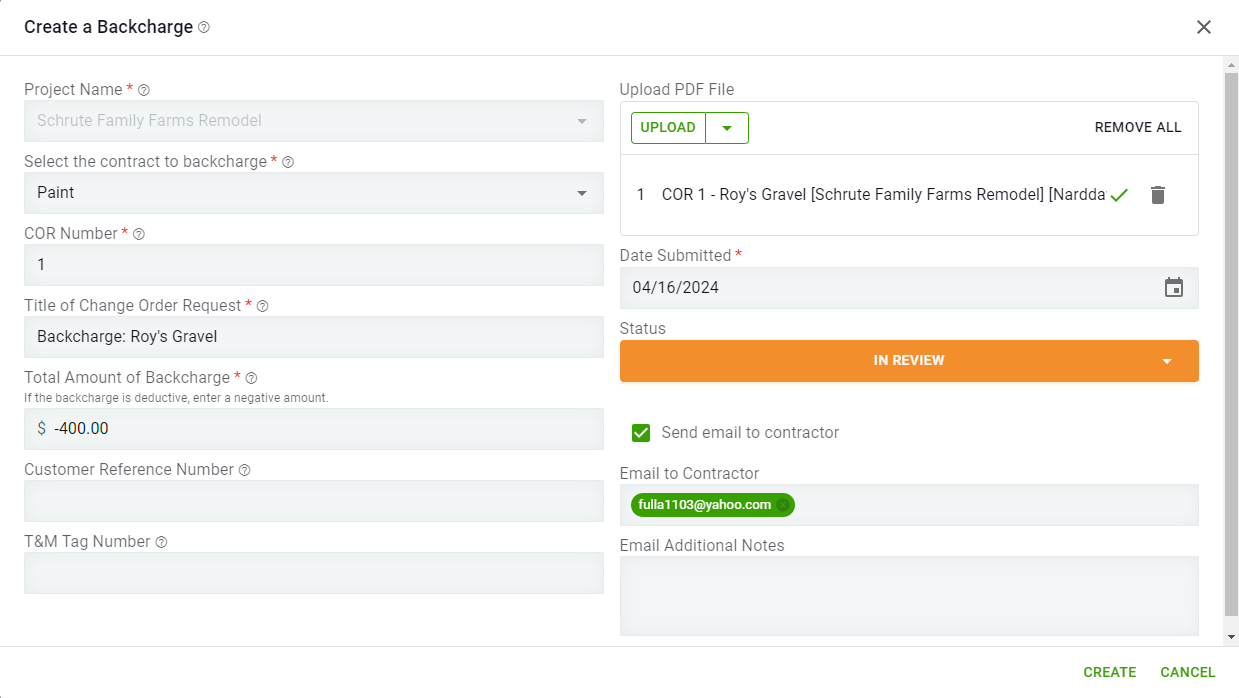
- Project Name - Related project is entered here and can't be edited
- Select the contract to backcharge - Select the contract from the dropdown that needs the Backcharge
- COR Number - The next available COR number for the contractor that is being sent the Backcharge is added here. This number can be edited/overwritten
- Title of Change Order Request - "Backcharge" is automatically added to the beginning of your title but you can adjust as needed
- Total Amount of Backcharge - The opposite amount of your COR is reflected here. ex. Your COR was for $100.00, you will see $-100.00 in this field
- Customer Reference Number - The original COR customer reference number is automatically populated here
- Upload PDF File - The original COR file is added here
- Date Submitted - Today's date is automatically populated but can be adjusted
- Send email to contractor - Determine if the contractor should be emailed
- Create - click Create when complete
The Backcharge COR is now reflected on the GC's Received COR log and the Responsible Contractor's Sent COR log with a "BC" symbol:
GC Received Log:

Contractor Sent Log: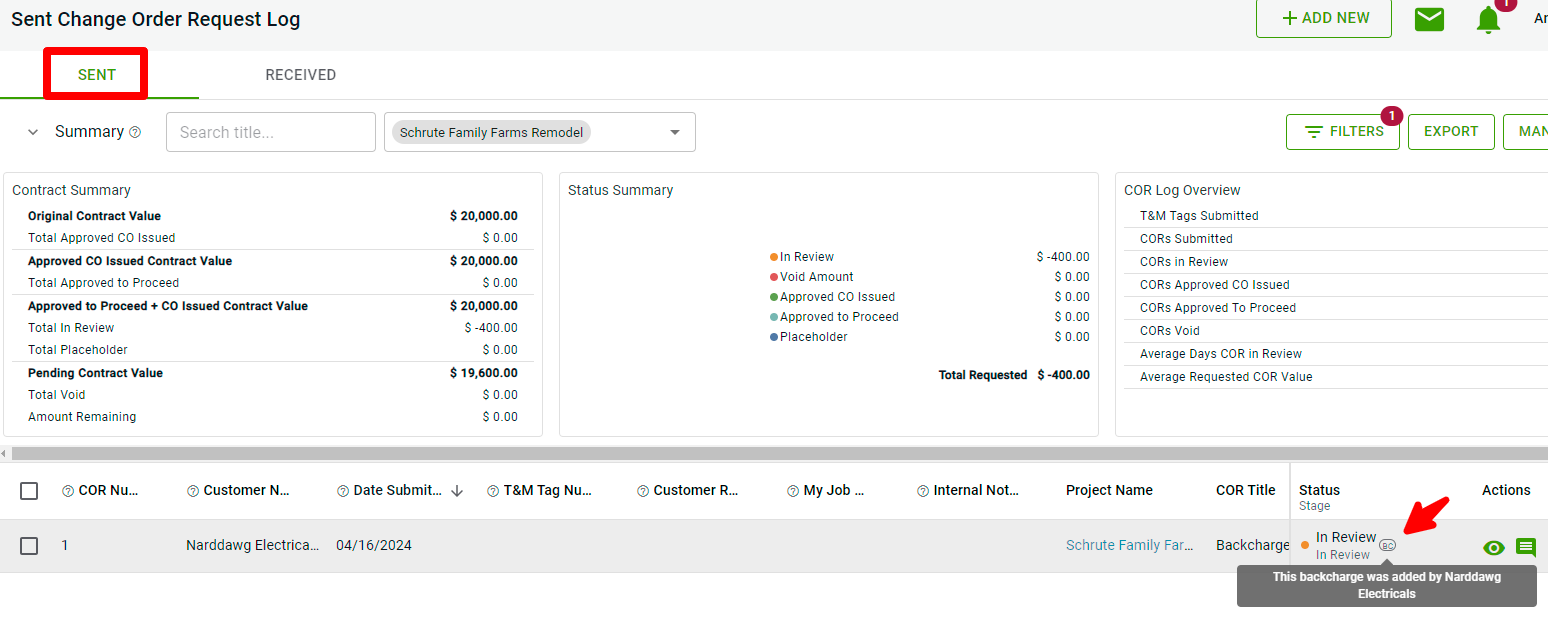
Summary Section:
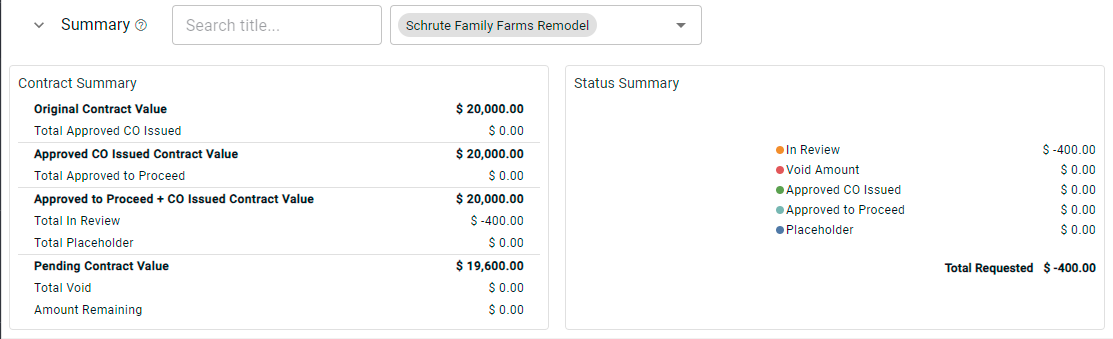
After creating the Backcharge, the amount is reflected in your COR Log Summary section:
GC Summary 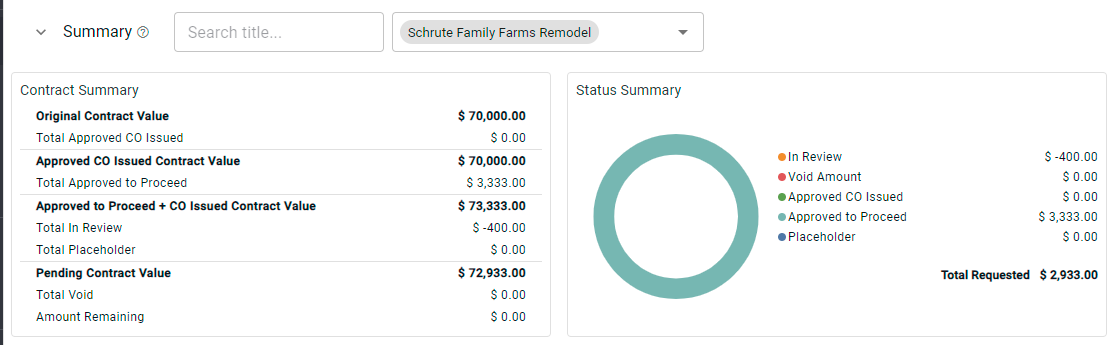
Contractor Summary