
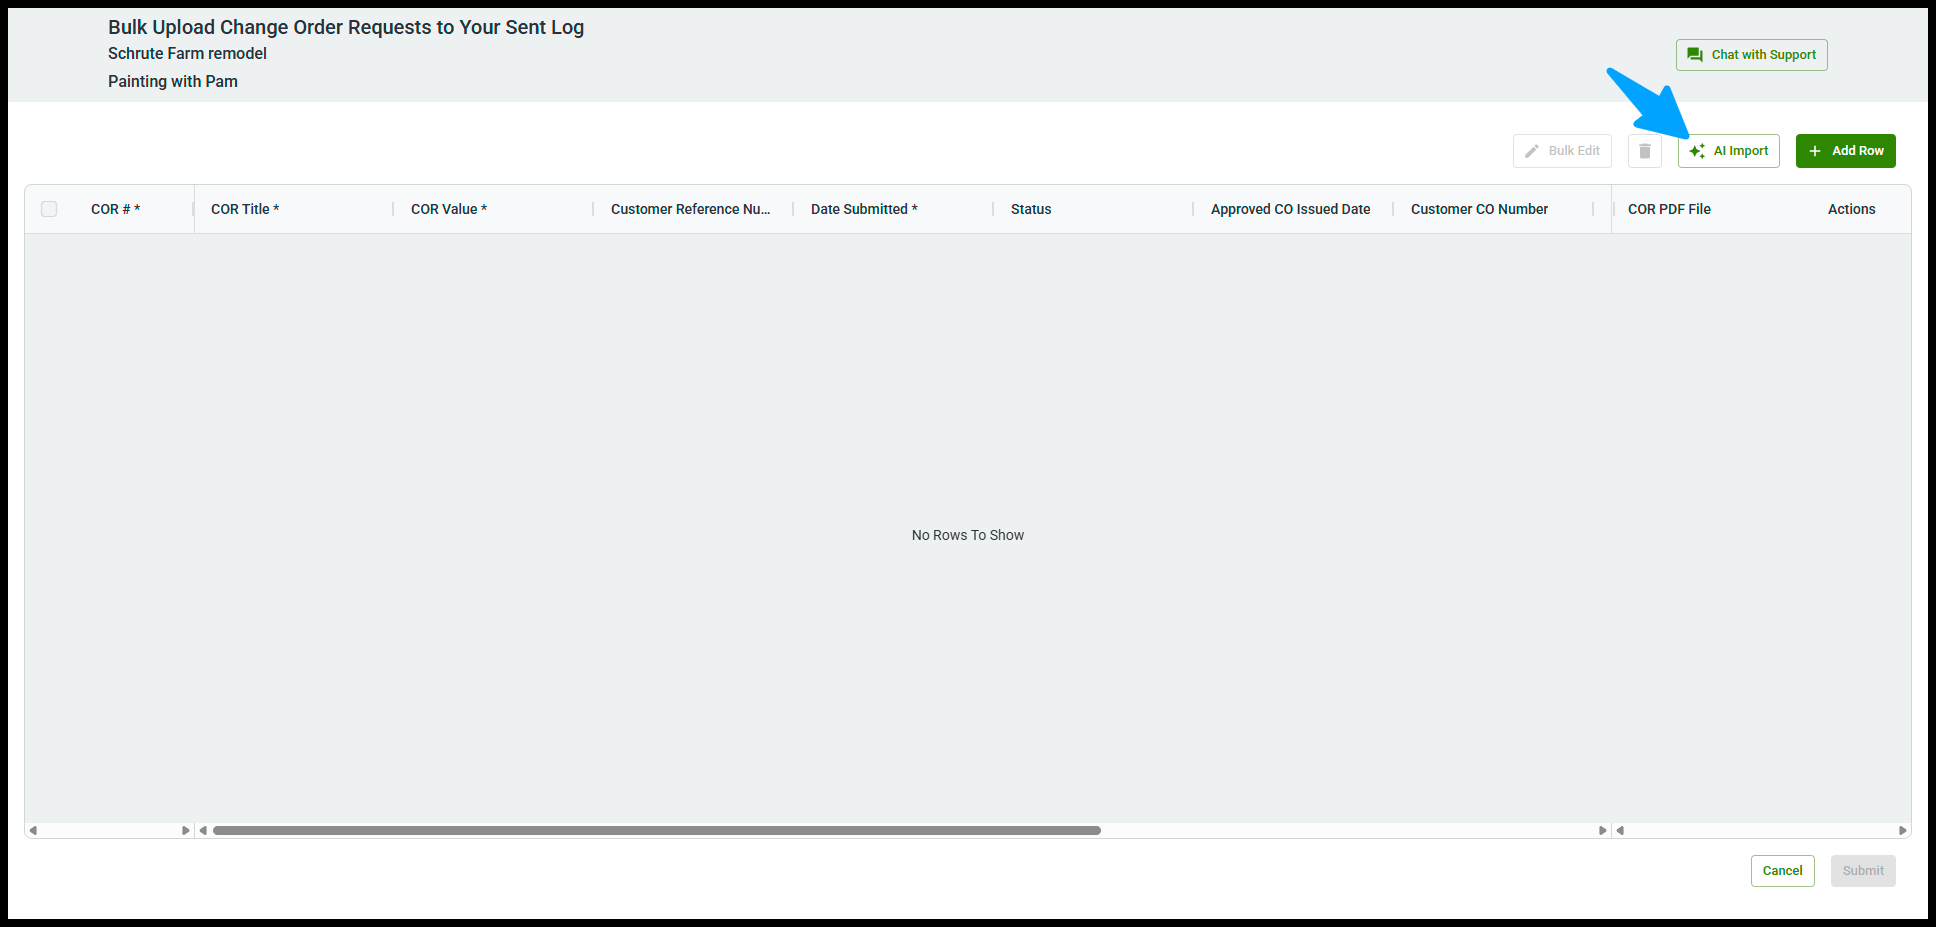
Have multiple CORs to add? AI Import (recommended) lets you upload a COR log PDF and bulk add CORs automatically.
Table of Contents
Bulk Upload CORs with AI Import
Bulk Upload CORs using Template
Bulk Upload Contractor CORs using AI Import
AI Import (Recommended)
AI Import is the fastest way to add multiple CORs at once. Upload a COR log PDF and Clearstory will:
-
Extract CORs automatically
-
Suggest field mappings
-
Create rows in your log for review
AI Import follows a 4-step wizard:
Upload → Analyze → Map → Import
AI Import Sent CORs
-
Go to your Sent COR Log.
-
Click Manage Log → Bulk Upload CORs.

-
Select your Project, then click Next.

-
Click AI Import to open the wizard.


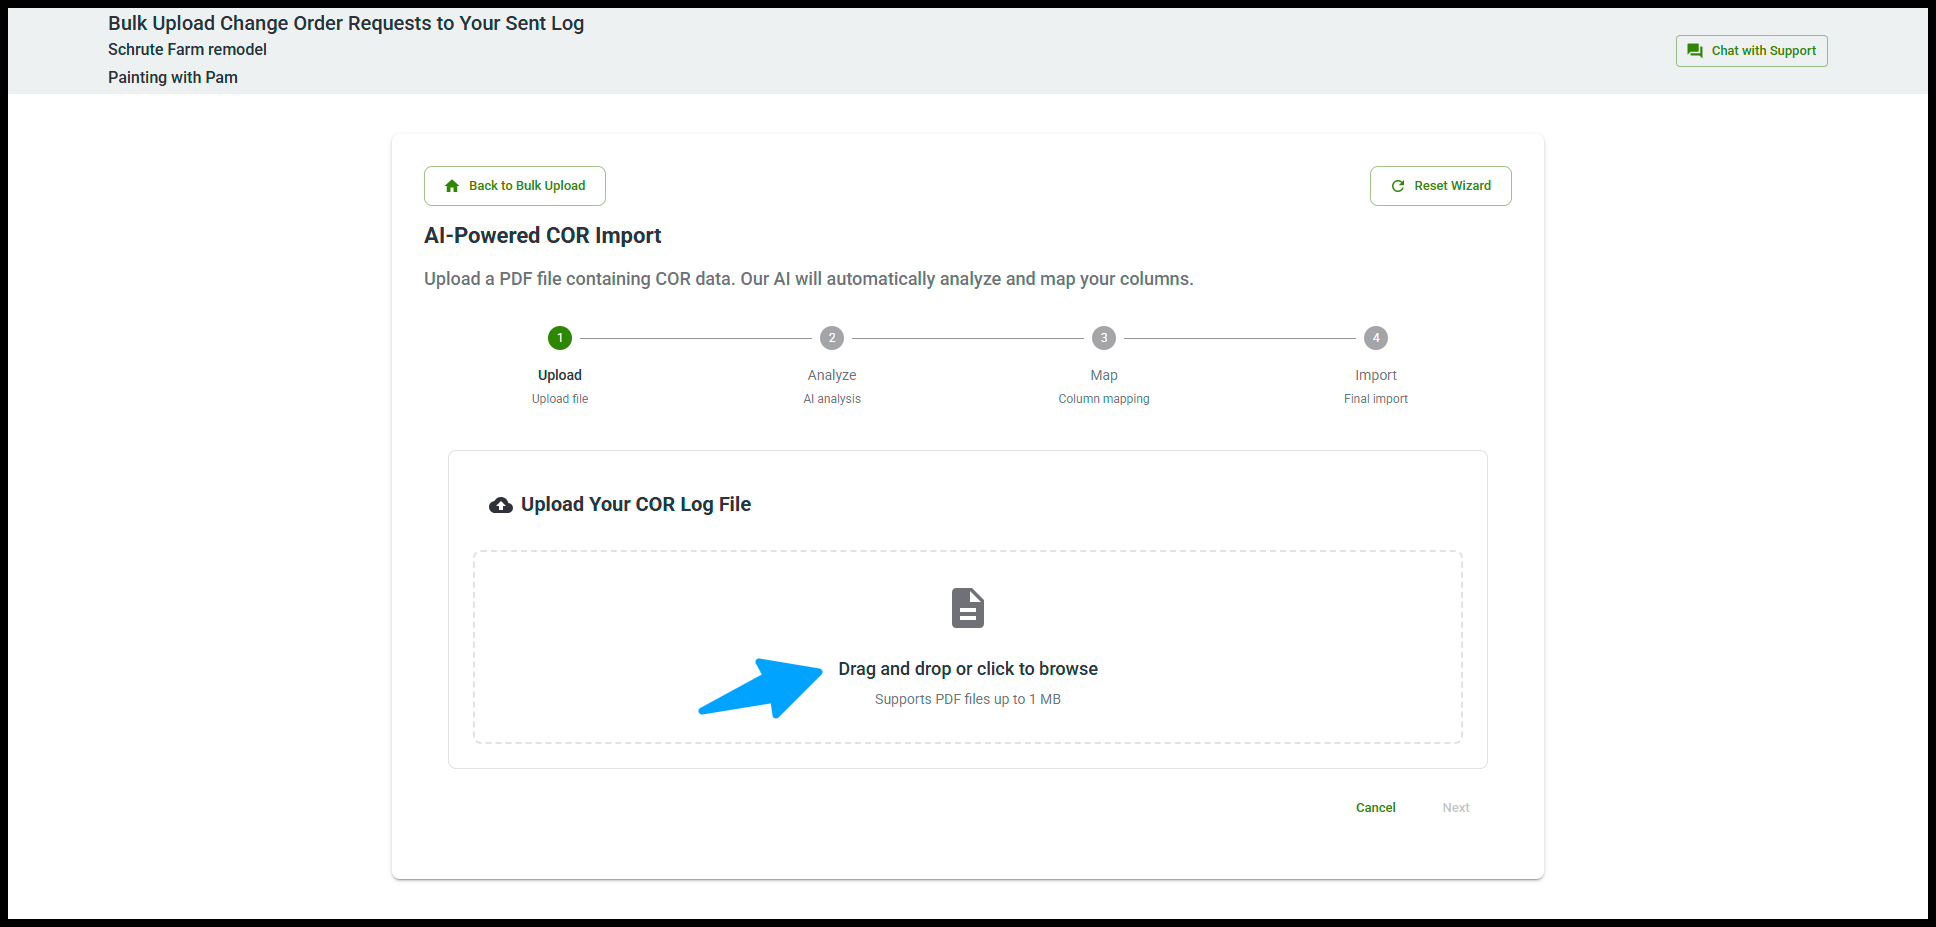
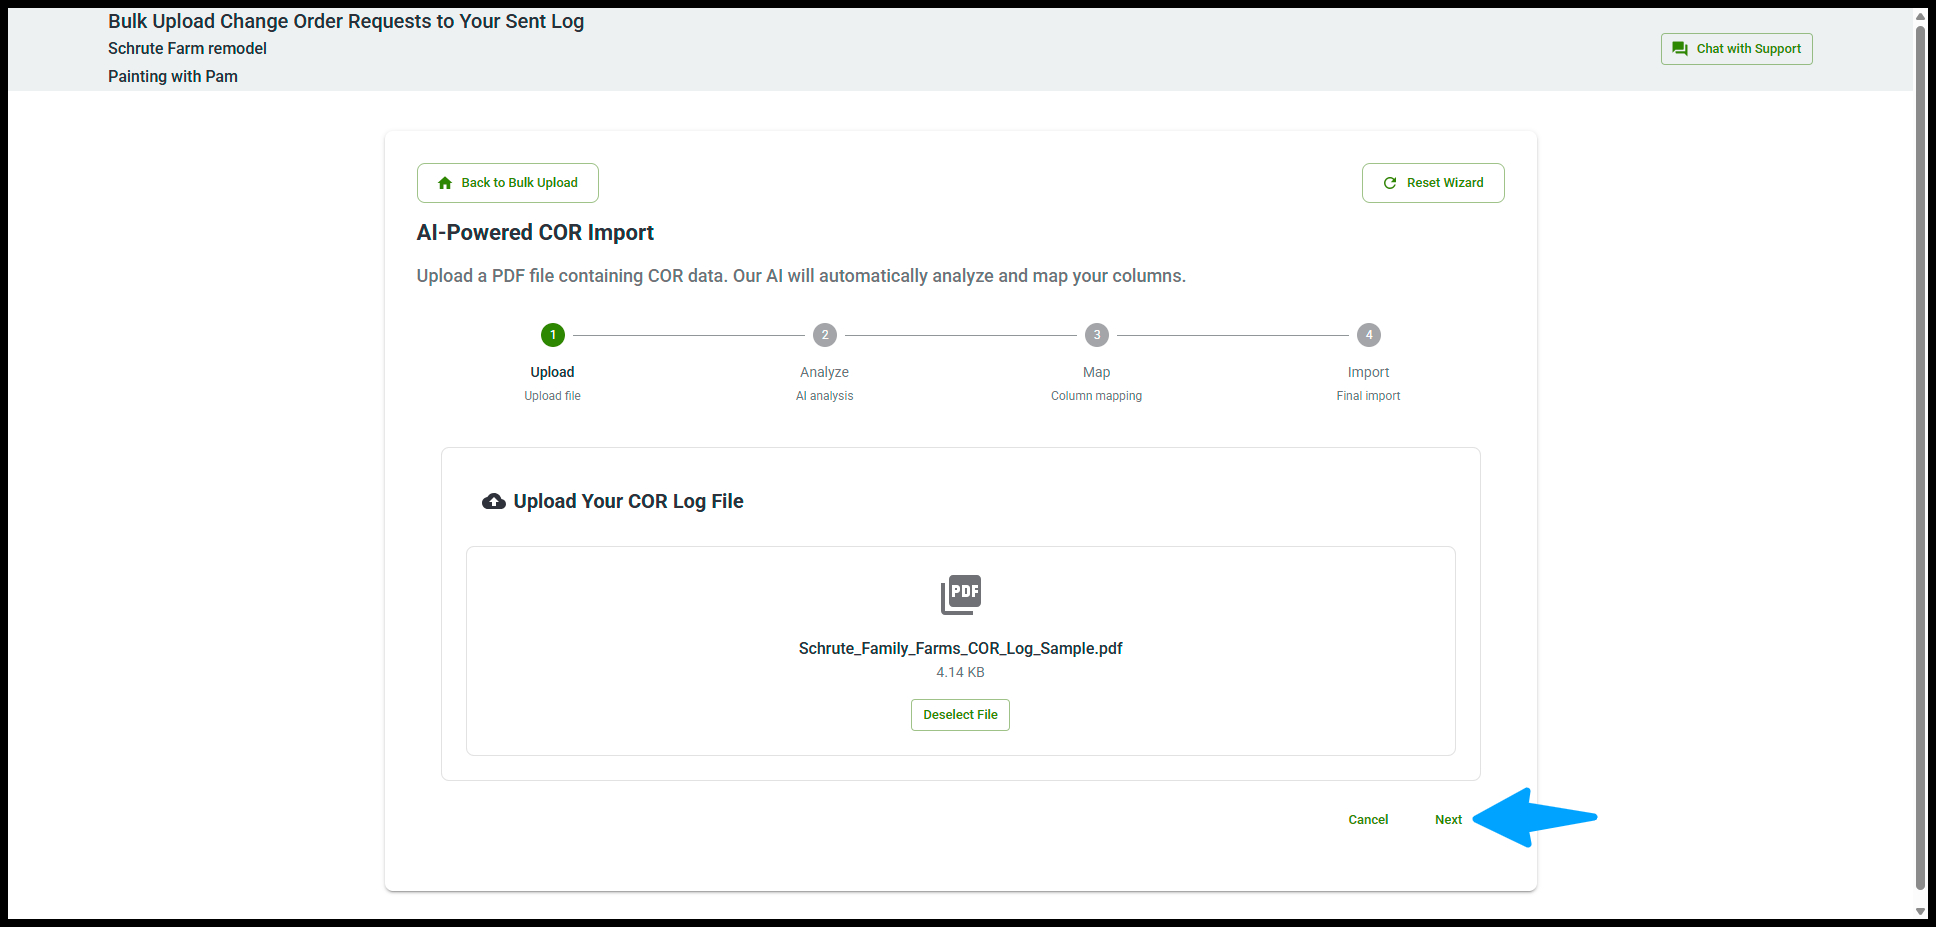
Step 1 — Upload
-
Drag and drop your COR log PDF (or click to browse).
-
Supports PDF files up to 1 MB.

-
-
Click Next.

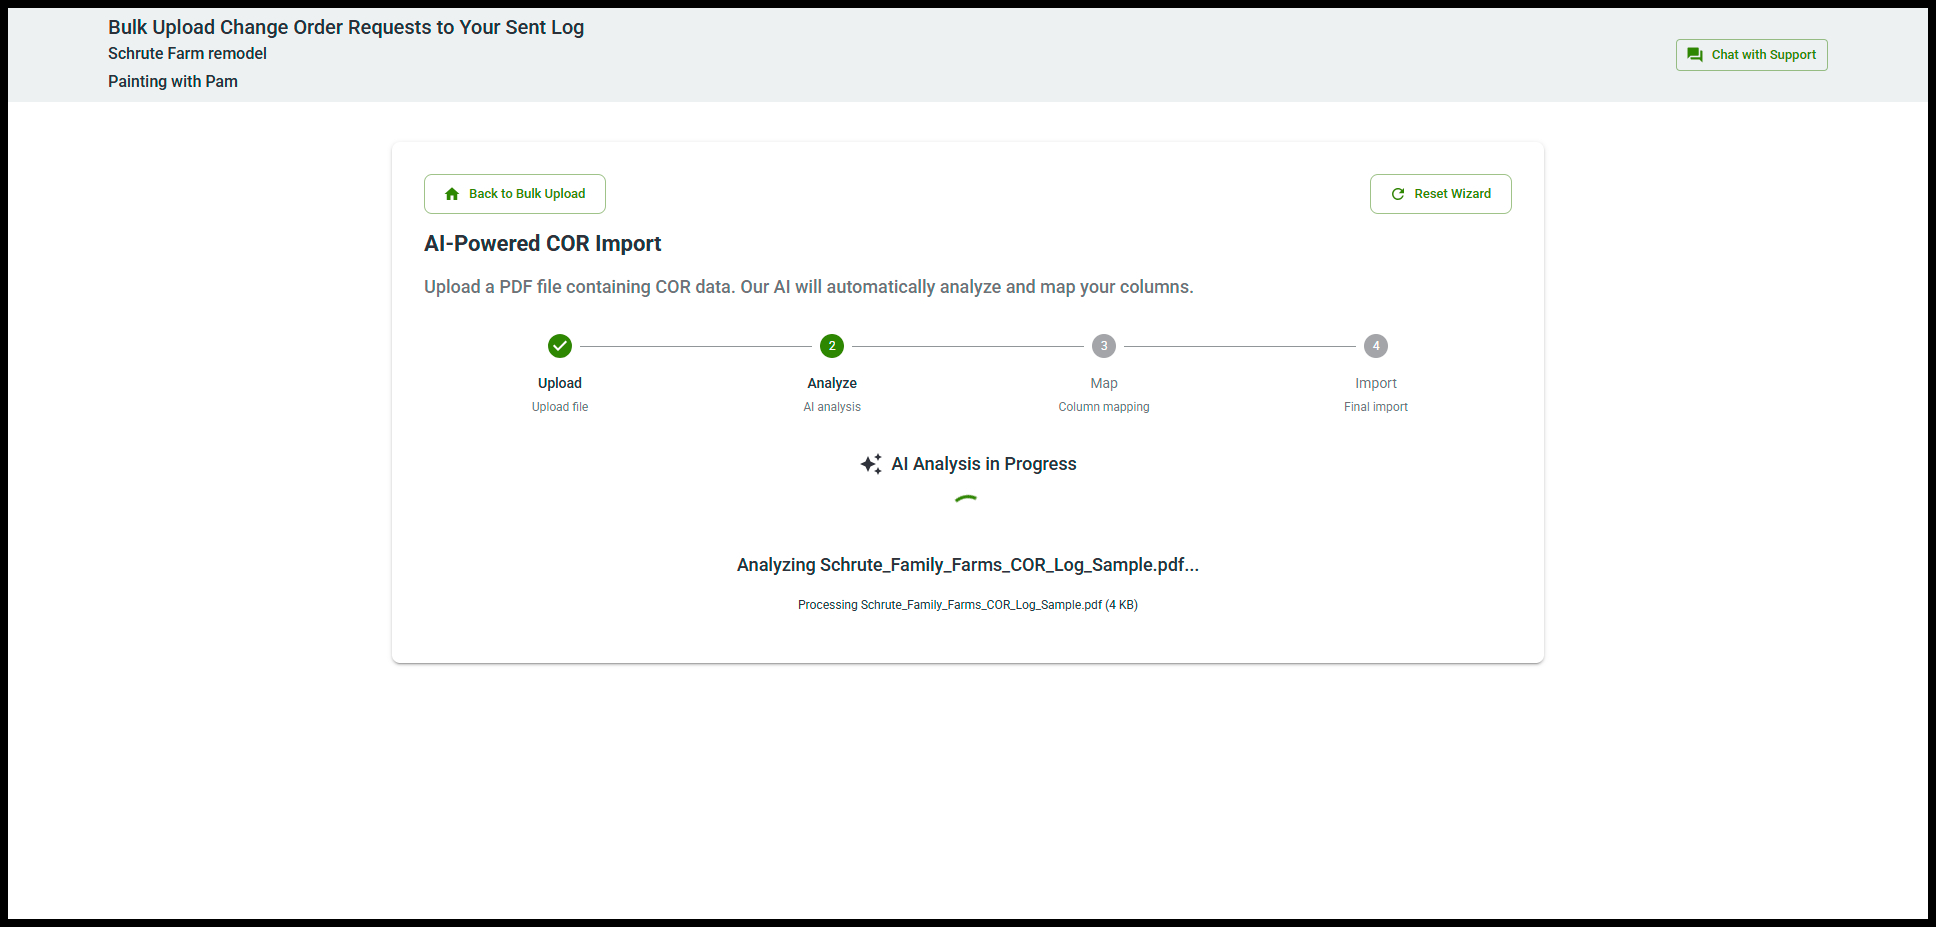
Step 2 — Analyze
-
Clearstory analyzes your PDF and detects COR fields.

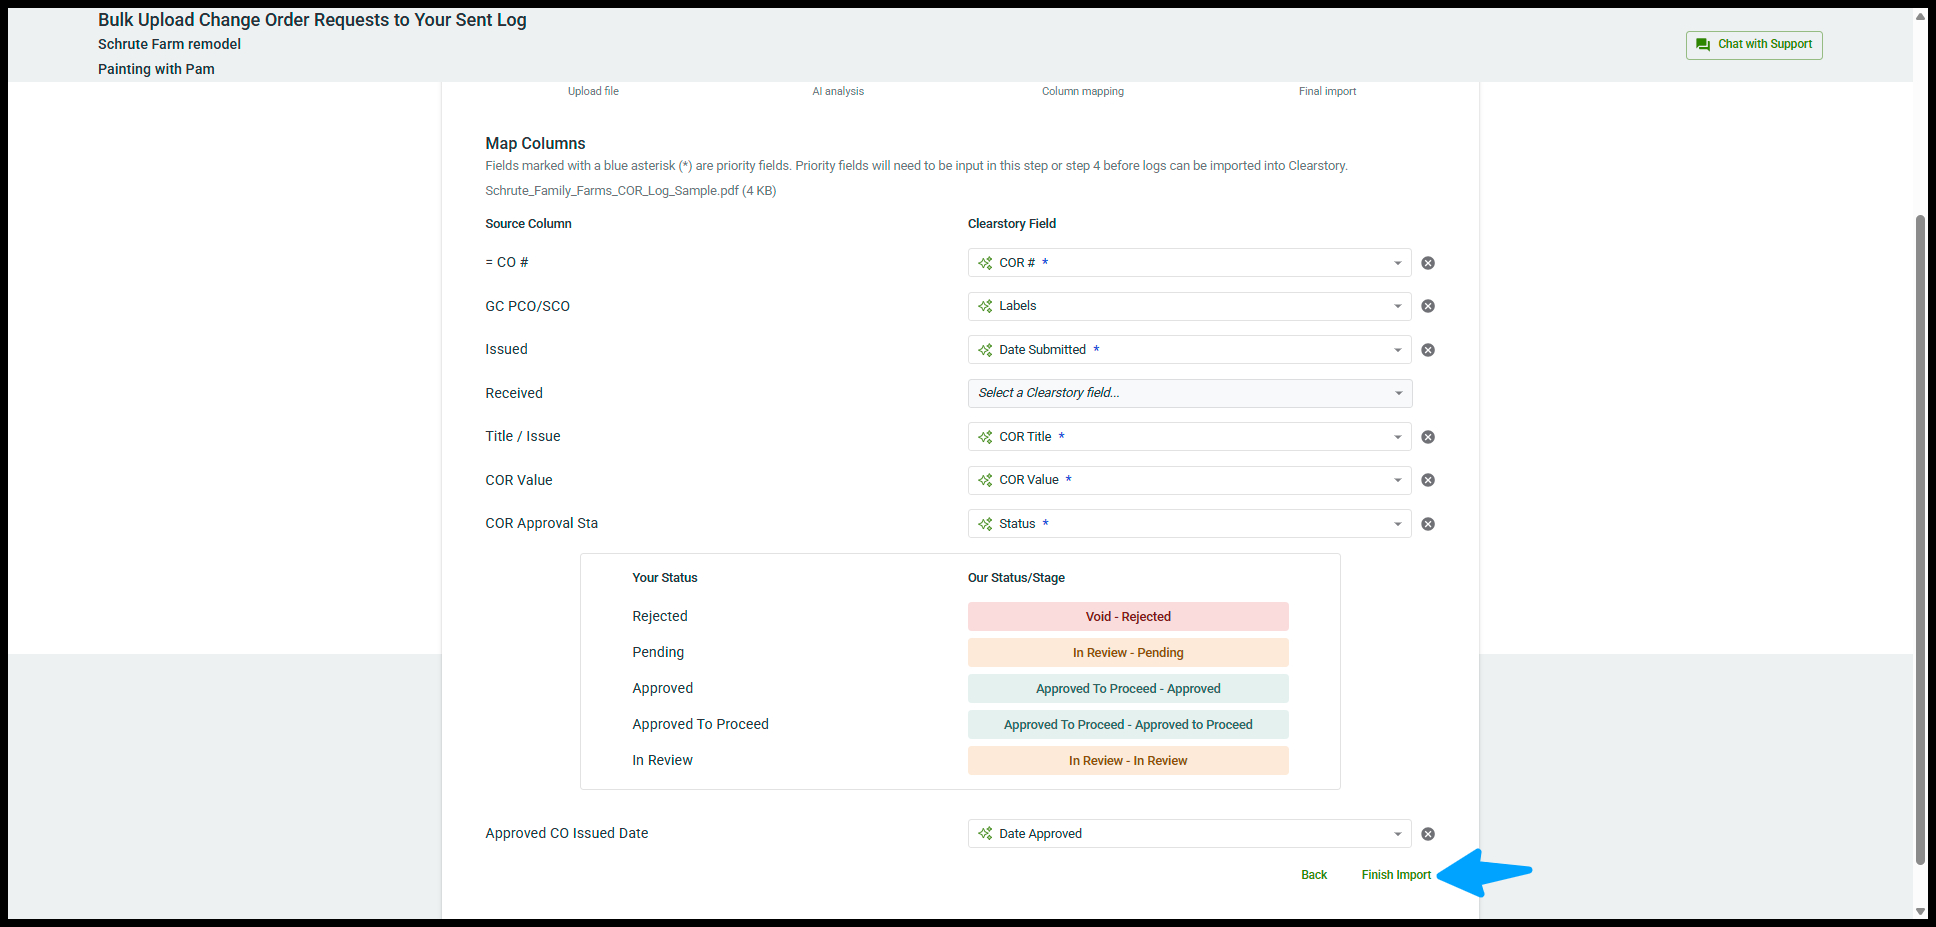
Step 3 — Map
-
In the Map Columns step, confirm that each Source Column matches the correct Clearstory Field.
-
Fields marked with a blue asterisk (*) are priority fields and must be mapped before you can import.
-
If a column is mapped incorrectly, use the dropdown to select the right Clearstory field.
-
You can leave non-essential columns unmapped.
-
Adjust any mappings as needed, then click Finish Import.

-
Step 4 — Import
-
Review the COR rows that will be created. Click Submit to surface any errors.
-
Required fields are marked with an asterisk (*)
-
Missing required fields show in red

-
- Correct any errors
- Click Add Row to add more CORs
-
When ready, click Submit

- When complete click Take me Back to my Sent Log

Result: All CORs from your PDF appear in your Sent COR log.
Bulk Uploading your CORs using Template
In the Bulk Upload screen, click Import CSV under Classic Import
Download the template and enter your CORs
- The Pre-Filled CSV Import Template provides an example of how the data should be entered to make sure your import is successful!
-
Do not change the column headers or order.
-
Date fields accept MM/DD/YYYY or YYYY-MM-DD formats.
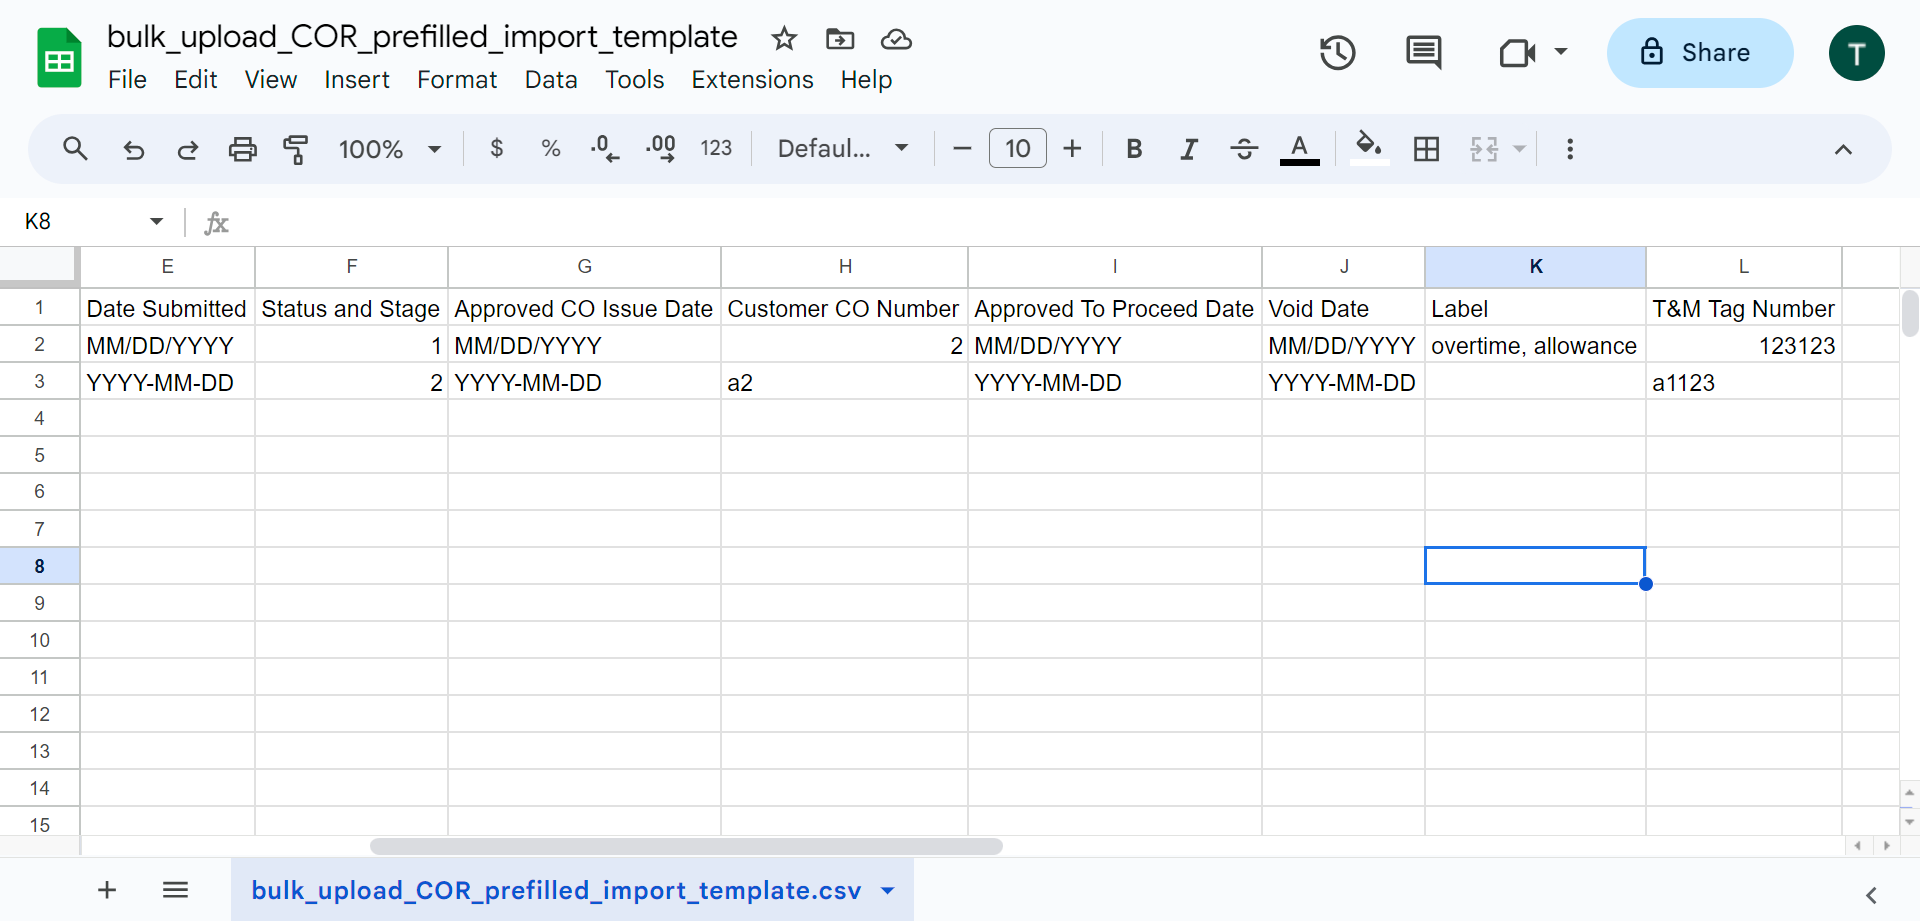
Notice there are two lines of data from columns E to L. This shows you the acceptable formats for each column. For example, in column E, or Date Submitted, you can enter your Date as 12/16/2023 (month/day/year) OR 2023-12-16 (year-month-day). 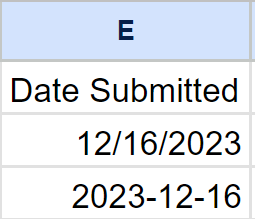
Additionally, Column F is your Status and Stage column. For importing Status and Stage, input the corresponding status/stage # from the below list. For example, by entering “2” the status will be Placeholder and the stage will be ROM. Below is the field mapping:
| Placeholder - Placeholder | 1 |
| Placeholder - ROM | 2 |
| Placeholder - On Hold | 3 |
| Placeholder - Estimate | 4 |
| Placeholder - Potential CO | 5 |
| Void - Void | 6 |
| Void - Revise & Resubmit | 7 |
| Void - Claim | 8 |
| Void - Rejected | 9 |
|
In Review - In Review
|
10 |
|
In Review - Revise & Resubmit
|
11 |
|
In Review - On Hold
|
12 |
|
In Review - ROM
|
13 |
|
In Review - Potential CO
|
14 |
|
In Review - Estimate
|
15 |
|
In Review - Claim
|
16 |
|
In Review - Pending
|
17 |
|
In Review - Pending Pricing
|
18 |
|
In Review - Pending Owner Review
|
19 |
|
In Review - Pending Approvals
|
20 |
|
Approved To Proceed - Approved To Proceed
|
21 |
|
Approved To Proceed - Approved
|
22 |
|
Approved To Proceed - On Hold
|
23 |
|
Approved To Proceed - Pending
|
24 |
|
Approved To Proceed - Pending Pricing
|
25 |
|
Approved To Proceed - Pending Owner Review
|
26 |
|
Approved To Proceed - Pending Approvals
|
27 |
|
Approved CO Issued - Approved CO Issued
|
28 |
Once your template is ready, click Import, select your file, and click open. Your CORs are now added! Any errors appear in red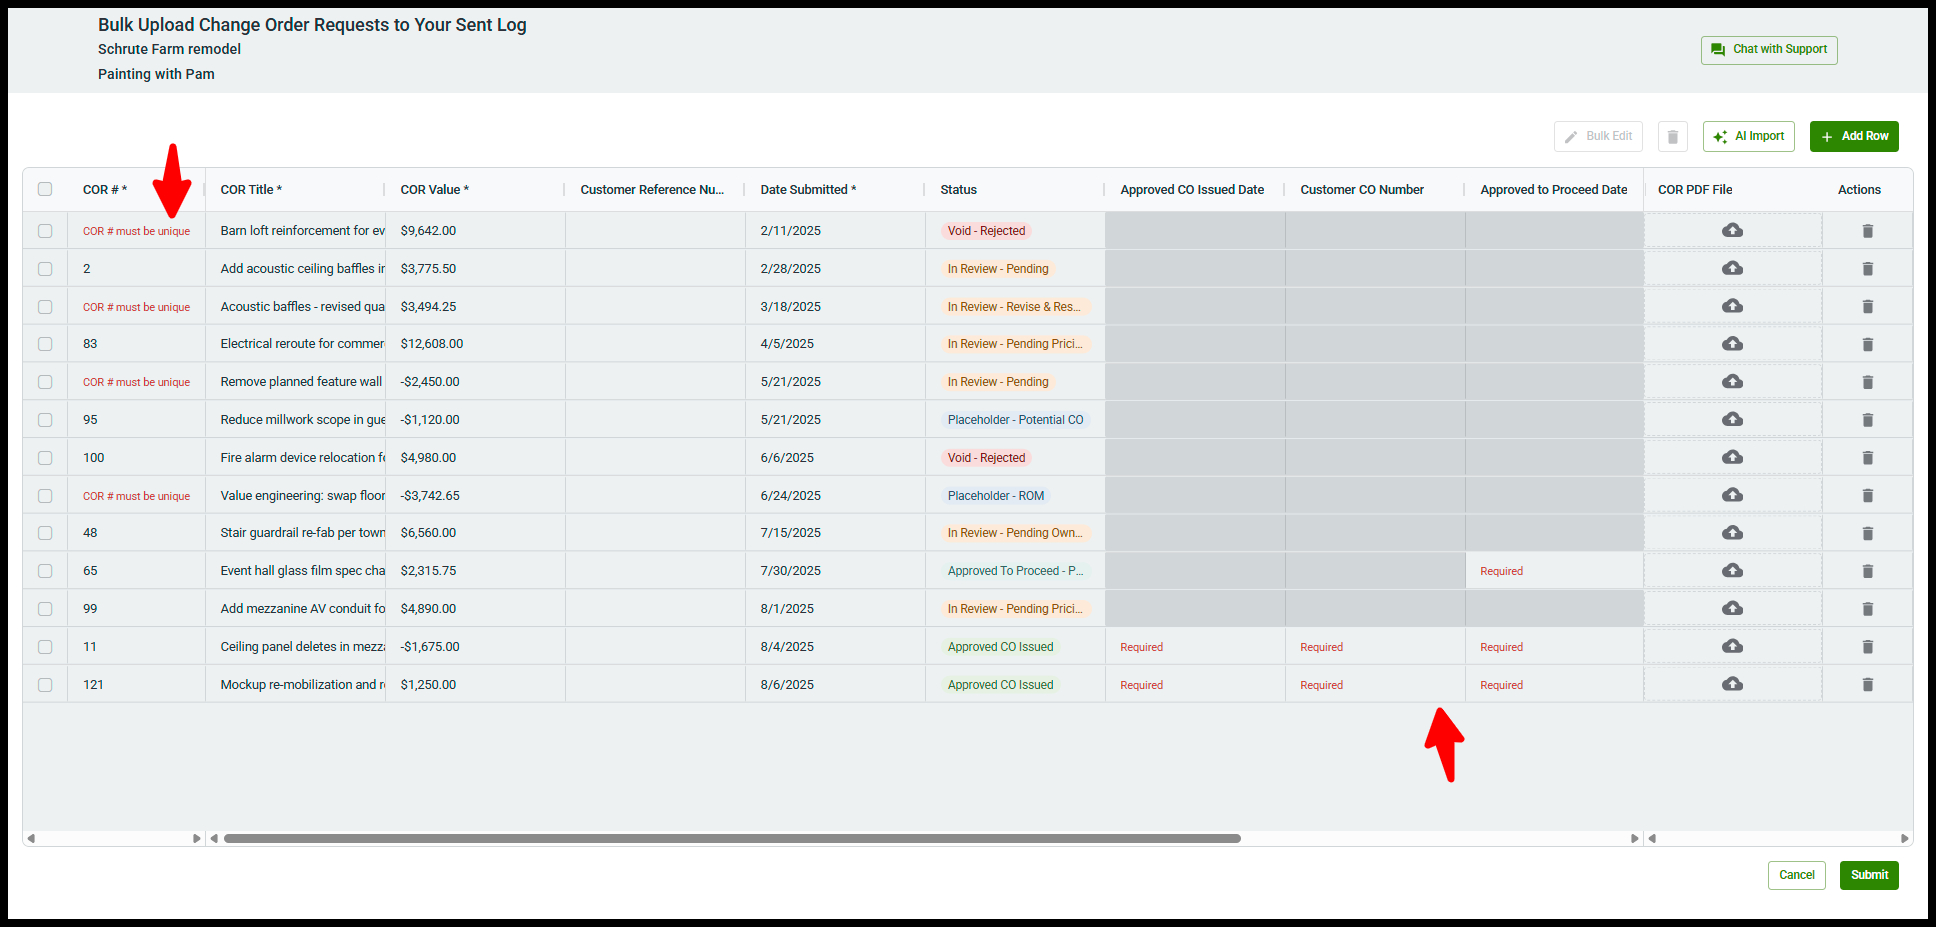
When you are ready, click Submit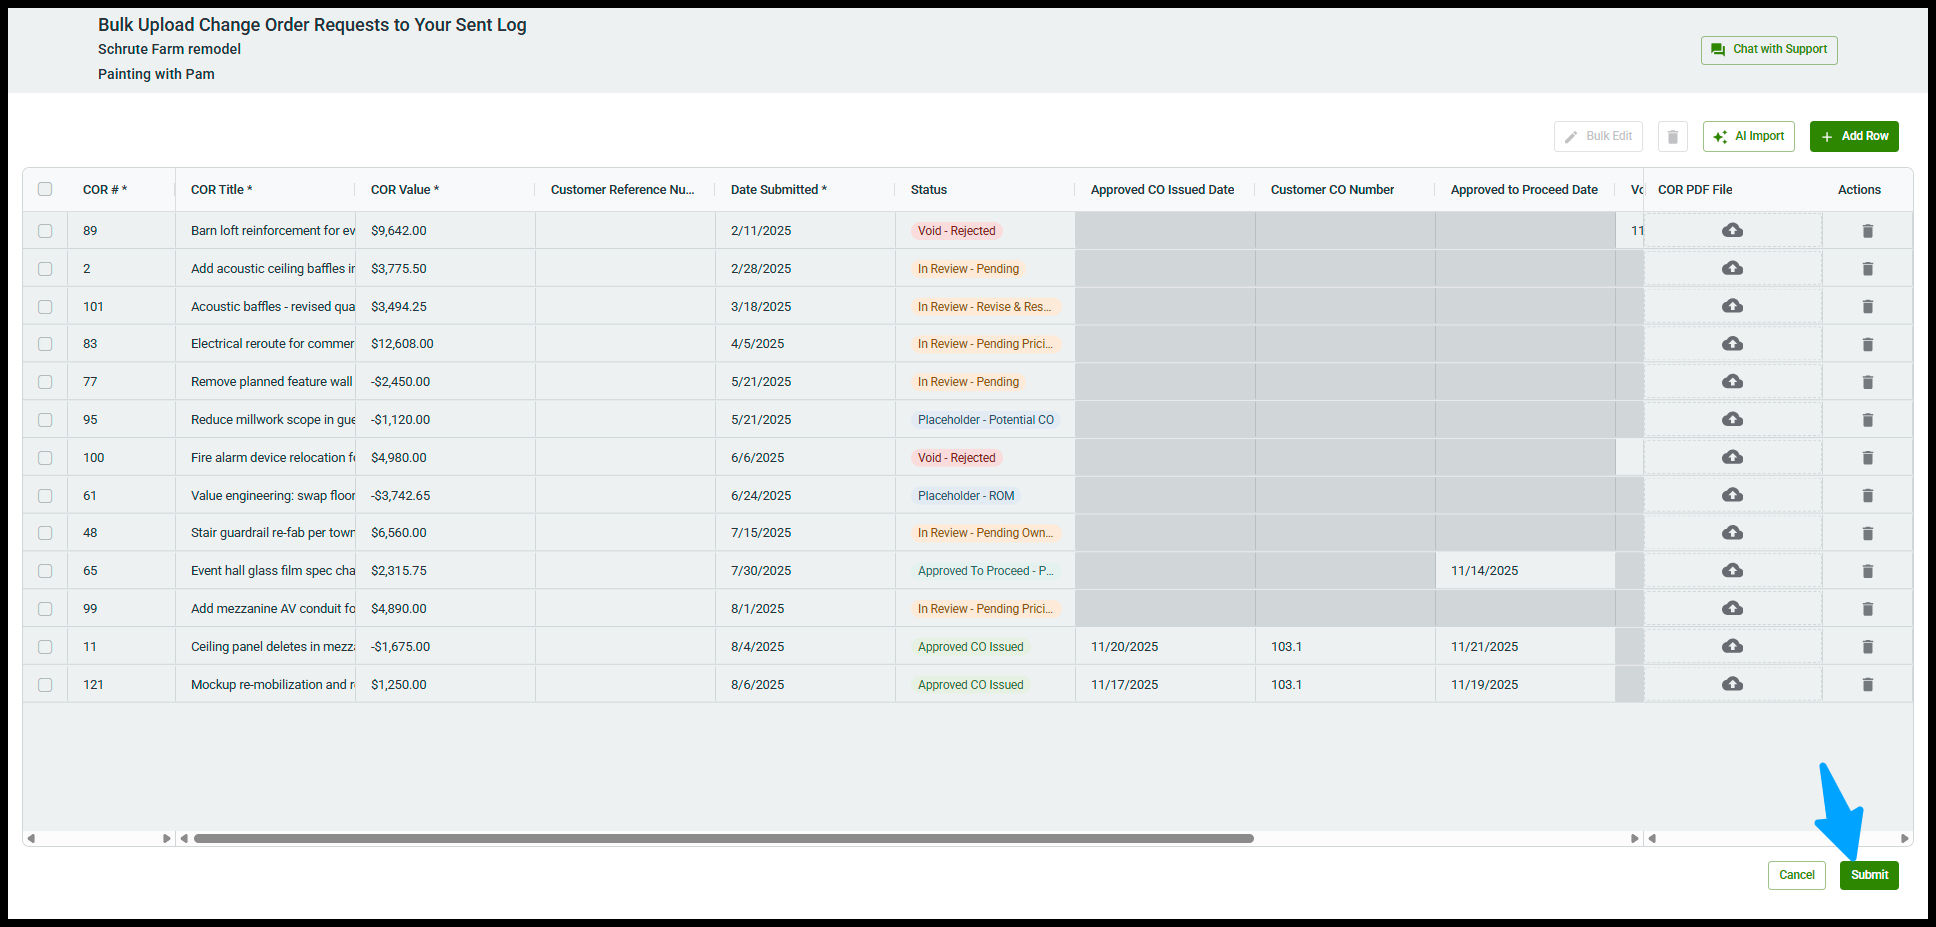
And are taken to your Sent COR log where you can see your newly added CORs! 
Bulk Upload CORs Manually
If you don’t have a COR log PDF (or you’re only adding a few CORs), you can enter CORs manually.
-
Click Add Row under Manual Entry

-
Fill out the required fields (marked with an asterisk *).

-
Repeat Add Row for each COR you want to enter.
-
When ready, click Submit.
Result: Your CORs are added to the log immediately.
Bulk Upload Contractor CORs using AI Import
AI Import Contractor Received CORs
-
Go to your Received COR Log.
-
Click Manage Log → Bulk Upload Contractor CORs.

- Select your Project, Contract, and click Next

-
Click AI Import to open the wizard.

Step 1 — Upload
-
Drag and drop your COR log PDF (or click to browse).
-
Supports PDF files up to 1 MB.

-
-
Click Next.
Step 2 — Analyze
-
Clearstory analyzes your PDF and detects COR fields.
Step 3 — Map
In the Map Columns step, confirm that each Source Column matches the correct Clearstory Field.
-
Fields marked with a blue asterisk (*) are priority fields and must be mapped before you can import.
-
If a column is mapped incorrectly, use the dropdown to select the right Clearstory field.
-
You can leave non-essential columns unmapped.
-
Adjust any mappings as needed, then click Finish Import.
Step 4 — Import
-
Review the COR rows that will be created. Click Submit to surface any errors.
-
Required fields are marked with an asterisk (*)
-
Missing required fields show in red

-
- Correct any errors
- Click Add Row to add more CORs
-
When ready, click Submit

- When complete click Take me Back to my Sent Log

Result: All CORs from your PDF appear in your Received COR log.
Bulk Uploading Contractor CORs (manually)
On your Received COR log, click Manage Log, and click Bulk Upload Contractor CORs
Select your Project, Contract, and click Next
Click Add Row under Manual Entry

Fill out the required fields and click Submit when ready
You receive an onscreen status message. Click Take me back to my Received Log when ready
